Last Updated: 3/5/2025
Besides creating a Repair Ticket, there are two different transaction types that can be done from the Repairs screen; Pickup Repair and Cancel Repair.
Instructions
A repair can be picked up after the work has been marked COMPLETED. A repair can be canceled only before it has been marked IN PROGRESS, otherwise the repair can only be completed or picked up.
Repair Pick up
- If the customer is already selected, click Create/Pick Up Repair from the Transactions screen.
- The repair ticket number can also be scanned in smart search and the repair will be loaded into the Transactions screen.
- You will be presented with a list of Current Repairs. Select an existing repair for pickup or cancellation.
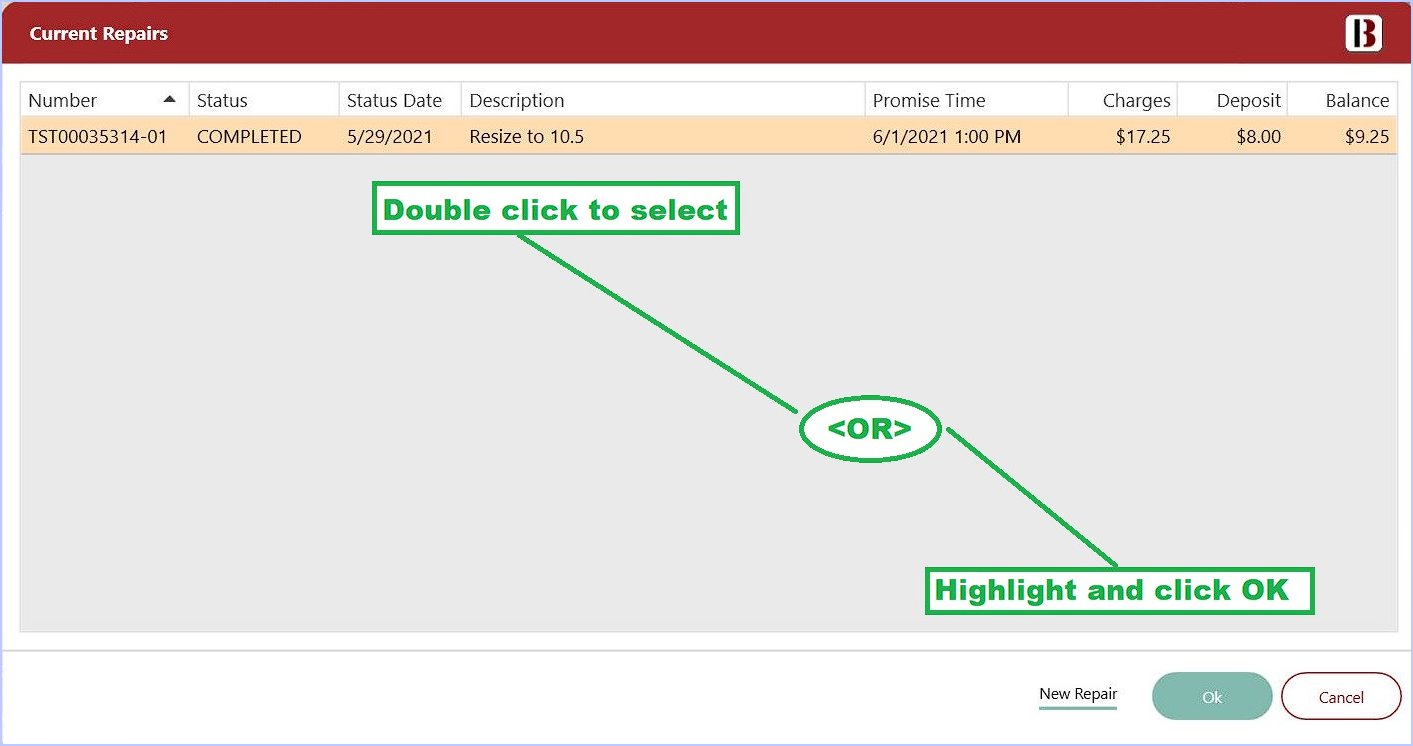
- In the above example, the repair is marked COMPLETED. This repair can be picked up
- If the Status is marked as IN PROGRESS, the Repair can be canceled.
- Double click on the repair and and select Pick Up Repair.
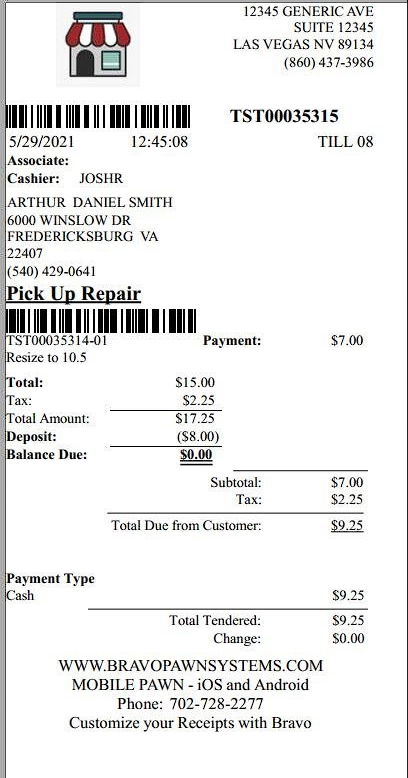
- Verify the details and then select Next to go to the Tender Screen to collect payment and complete the transaction.
- If repairs are taxable, Bravo will automatically calculate the sales tax on the total repair charge.
Note - If you have Scan Item Verification set up for your store, you will need to scan or enter the ticket item number before returning it to the customer.
Bravo will print a Repair ticket and a receipt.
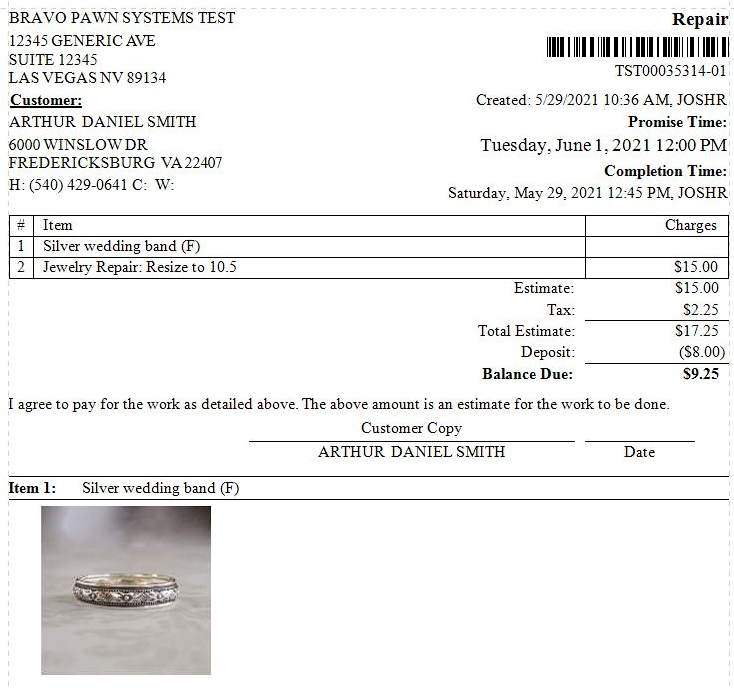
A Repair ticket will print along with a receipt for the deposit and a label for the repair. The repair label displays details about the first item on the repair, the short description of the repair, the customer name, and the promise date.
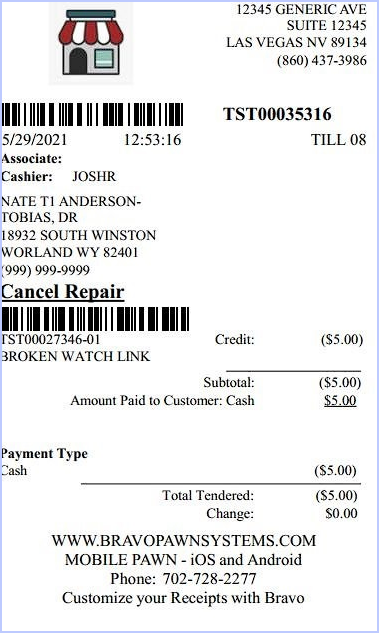
Cancellations
- If the repair is marked NEW, the repair can be cancelled. Cancel Repair is the only option in the Transactions screen when the Status is NEW or IN PROGRESS.
- Select Cancel Repair, verify the detail, then click Next to get to the Tender Screen.
- The system will prompt you for how to Refund the customer if they put a Deposit.
- The system will default the refund to be Cash. If you want to change it, you will first have to make the Amount column be $0 to change it to Store Check.
- The store can also be configured to allow Refund to Store Credit or Convert to Gift Card.
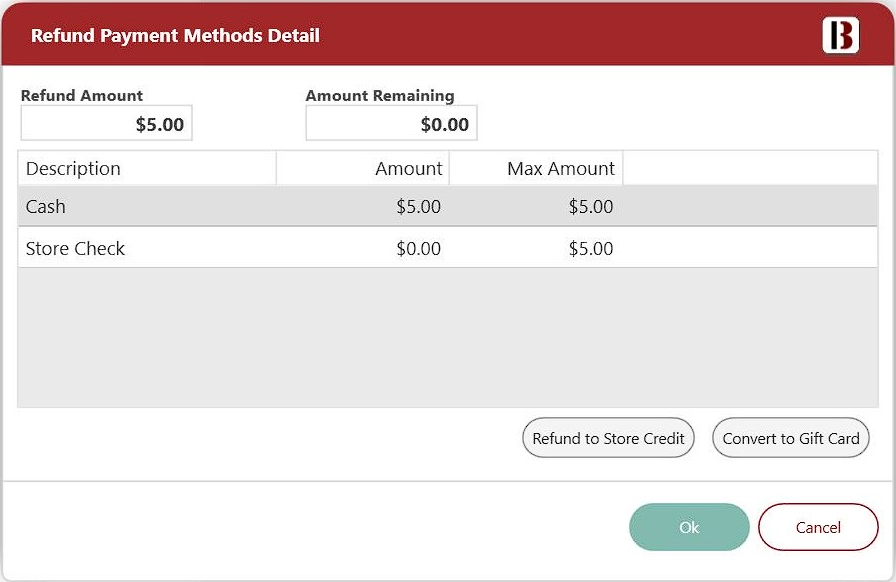
- Once you make your Refund choice, you will see the tender used on the screen. Then click Save to complete this action.
Note - If you have Scan Item Verification set up for your store, you will need to scan the Repair ticket item number before returning it to the customer.
- Bravo will print a receipt for the cancellation and refund.