last Updated: 3/25/2025
Serialized Stock can only be created in specific firearm-related categories through the Vendor Catalog Integration or the Create Stock screen by specifying Manufacturer and Model.
This article covers how to create, purchase, and sell non-serialized Product SKUs. For details on serialized Stock, see Serialized Stock article.
Outline of Stock
- Stock in Bravo refers to items with a company-wide inventory number for tracking quantities, typically used for retail inventory.
- In multi-store companies, this number allows easy item transfers between stores while maintaining accurate quantity records.
- Currently, Stock outside of firearm categories does not support serialization, so unique serial number differentiation is not possible.
Table of Contents
Cost of Goods Sold (when Stock Quantity is zero)
Create New Stock SKU
- To use Stock, new SKU numbers must be created using the System Configuration screen.
- Select System Configuration from the Bravo Dashboard
- From the left hand side of the screen, select the Company (top of the tree) and select the Stock tab.
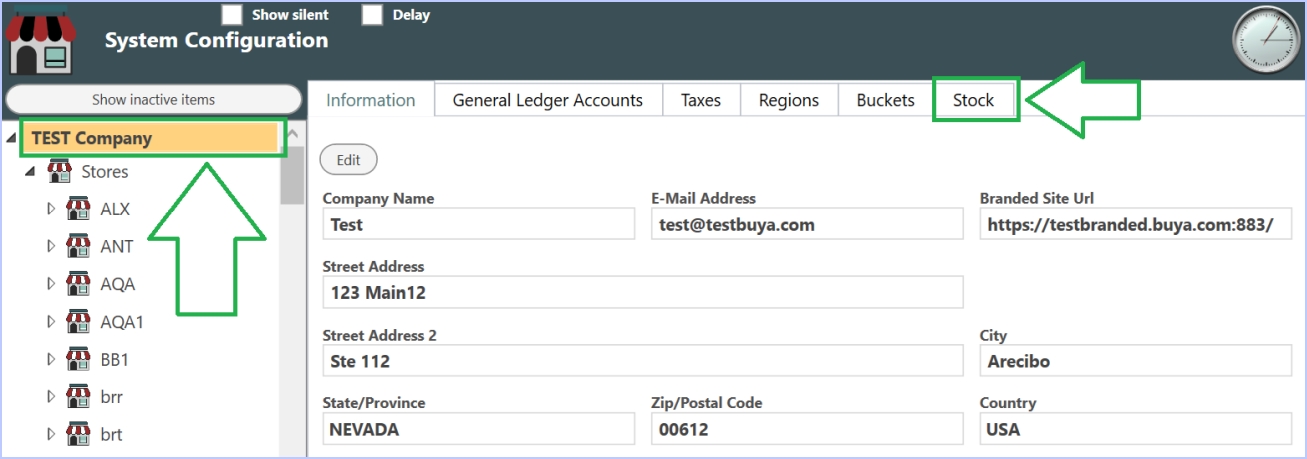
- To create a standalone Stock, click Edit, then click Create Stock.
- This will open the Create SKU screen. Alternatively, you can use Vendor Catalog Integration to create a Stock from a catalog item.
- Enter Stock details as described in the article for the Create Stock Screen, then click Next to return to the previous screen, where you can review pending changes and save the Stock.
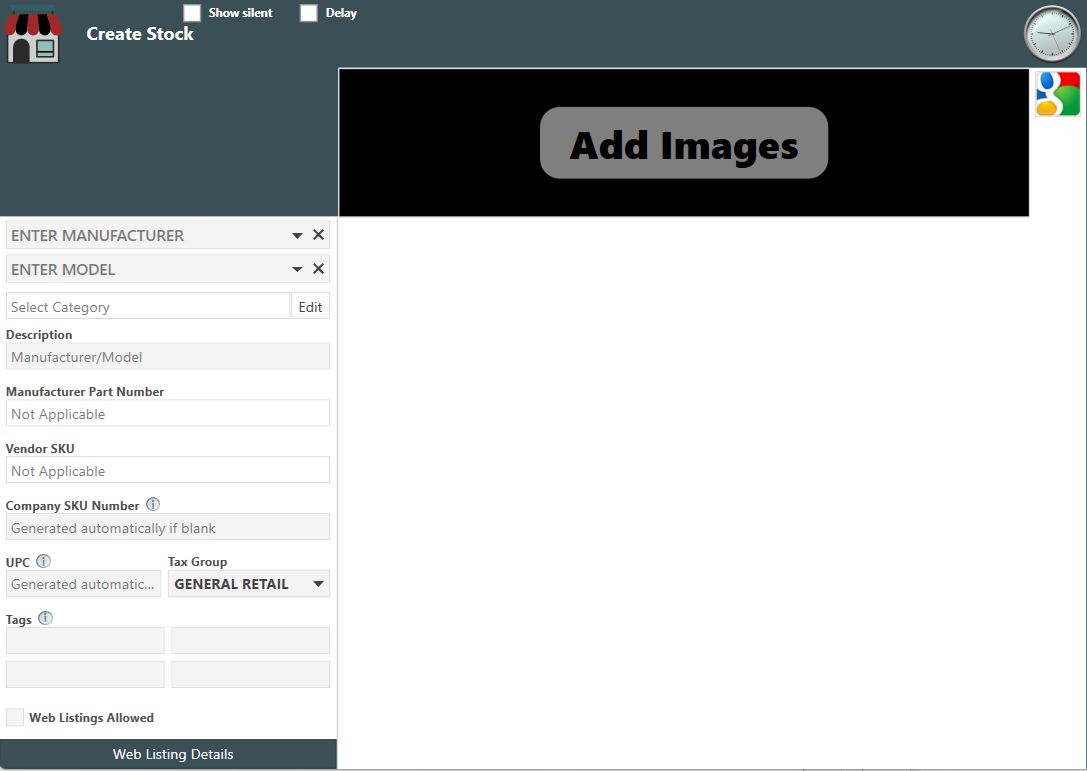
- Tax Group can now be defined when creating a Stock.
- Company SKU numbers are global. The same stock description, number, and price apply to all stores within a company.
- Clicking Save creates the stock in all stores, and any edits will update all stores as well.
- While stock configuration is global, stock count and total cost are tracked at the store level, reflecting each store's current quantity on hand.
A Stock can only be disabled if the quantity is currently zero at all stores.
Cost Averaging
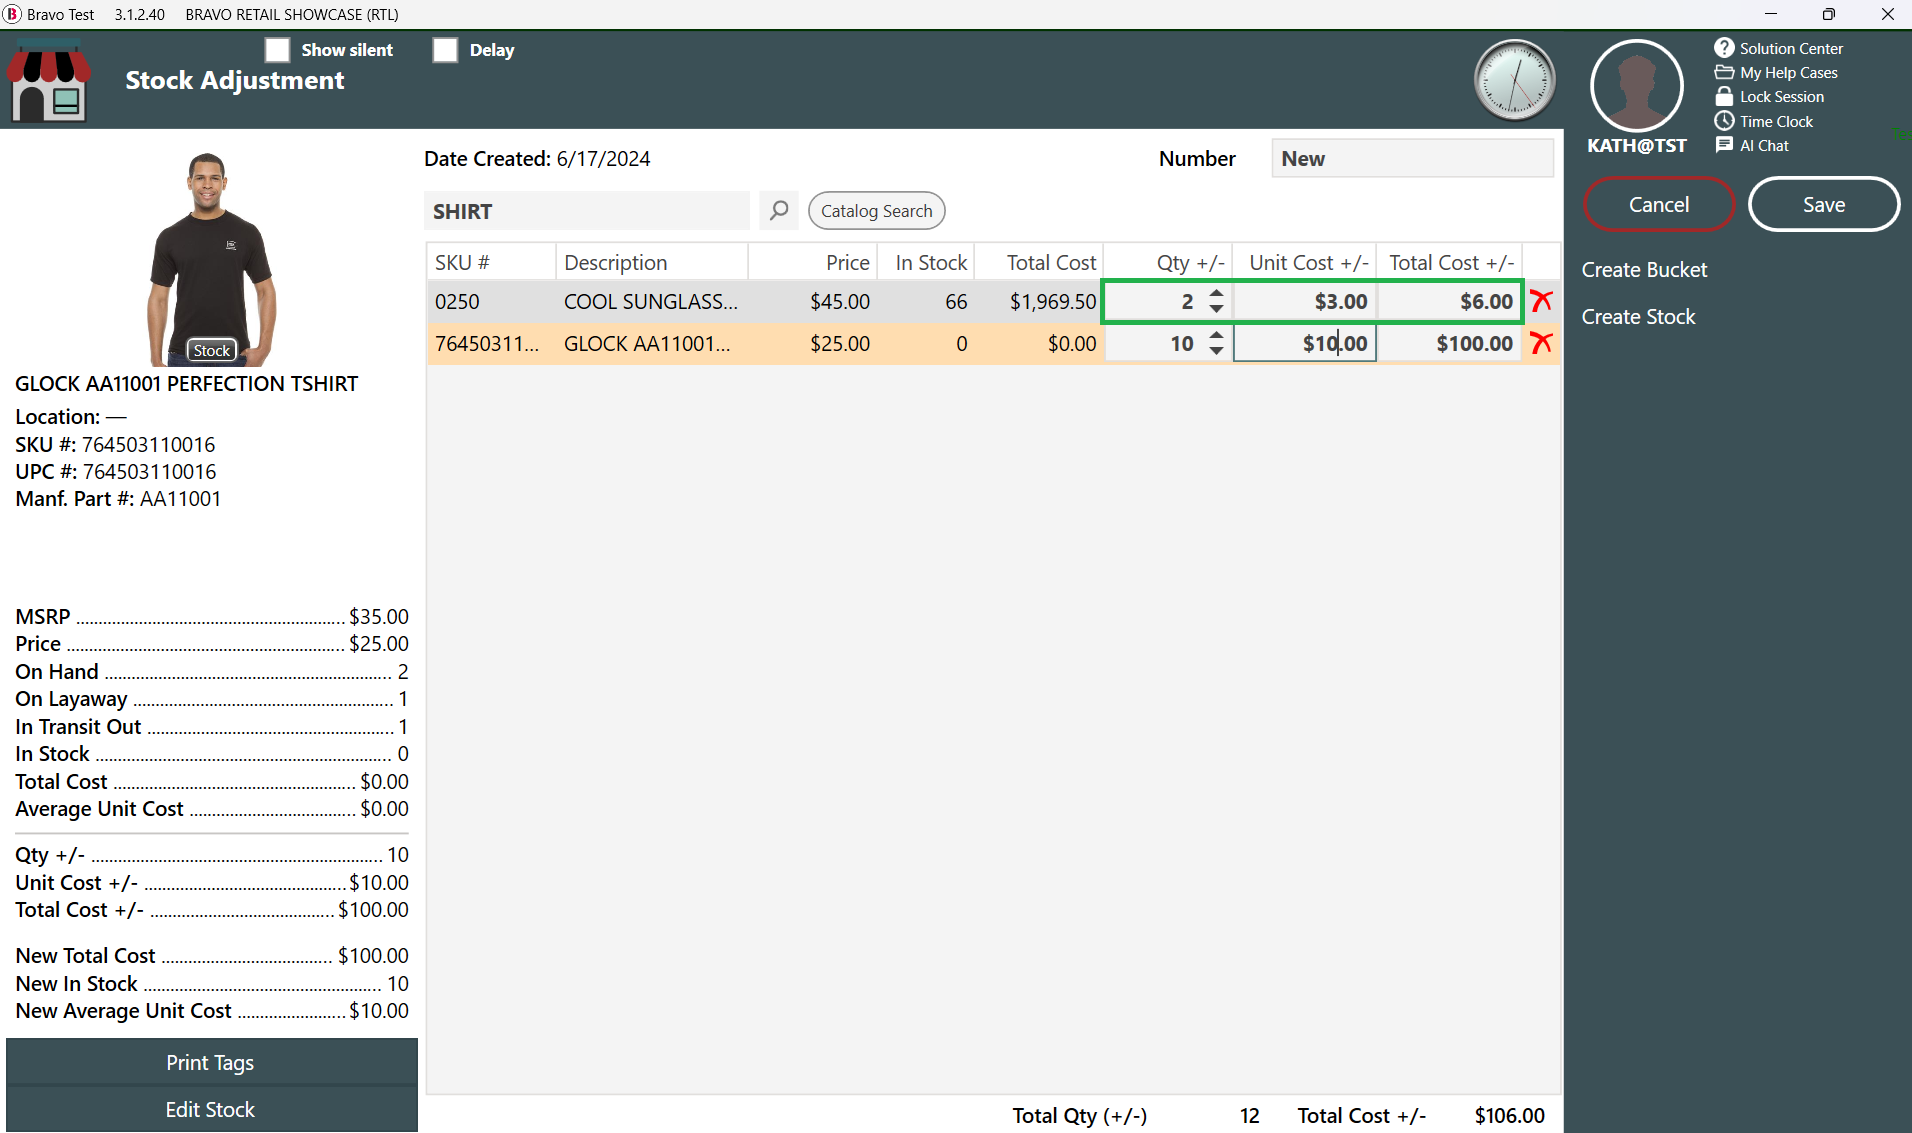
Non-serialized Stocks use cost averaging to calculate the cost of items sold. Selling a Stock decreases the quantity and cost based on the average cost of total stock.
- For instance, with 10 items at a total cost of $50, each item costs $5. Selling 2 items totals $10, leaving 8 items and $40 remaining.
When adding items through inventory edits or purchases, their cost and quantity increase the Stock total, and a new average cost is calculated.
- For instance, if a stock has 10 items costing $50, the average cost is $5. If 5 more items are added for $20, the new cost per item becomes $4.67.
- New total cost: $50 + $20 = $70
- New quantity: 10 + 5 = 15
- New cost per item: $70 ÷ 15 = $4.67
- If 6 more items are added for $37, the average cost changes to $5.10.
- New total cost: $70 + $37 = $107
- New quantity: 15 + 6 = 21
- New cost per item: $107 ÷ 21 = $5.10
With cost averaging, if the stock quantity is zero, the current cost is also zero.
Cost of Goods Sold (when Stock Quantity is zero)
Non-serialized Stocks can be sold with manager approval even if the available quantity is less than what is sold.
- If the available quantity is less than the sold quantity, it will drop to zero, and the remaining cost will be the sale cost.
- The quantity on hand won't go negative, allowing sales even when out of stock.
- When a Stock is out-of-stock (quantity on hand is zero), the sale cost will also be zero.
To ensure accuracy, it is advised to purchase more items for the Stock if inventory counts are incorrect. See Stock Management.
Stock Management
If you need to add to the number of items in a Stock you can use the Stock Management feature from the Inventory screen. Read the article, Purchase Items into Bravo to learn more about how to purchase items in Bravo.
- To purchase items into a Stock, on the dashboard select Inventory, then Stock Management.
- Click on the Receivings Tab and from the left-side menu click Add Receiving.
- You will need to search for the SKU you are purchasing into. You may search by the Company SKU Number, UPC, Tags, or by Description.
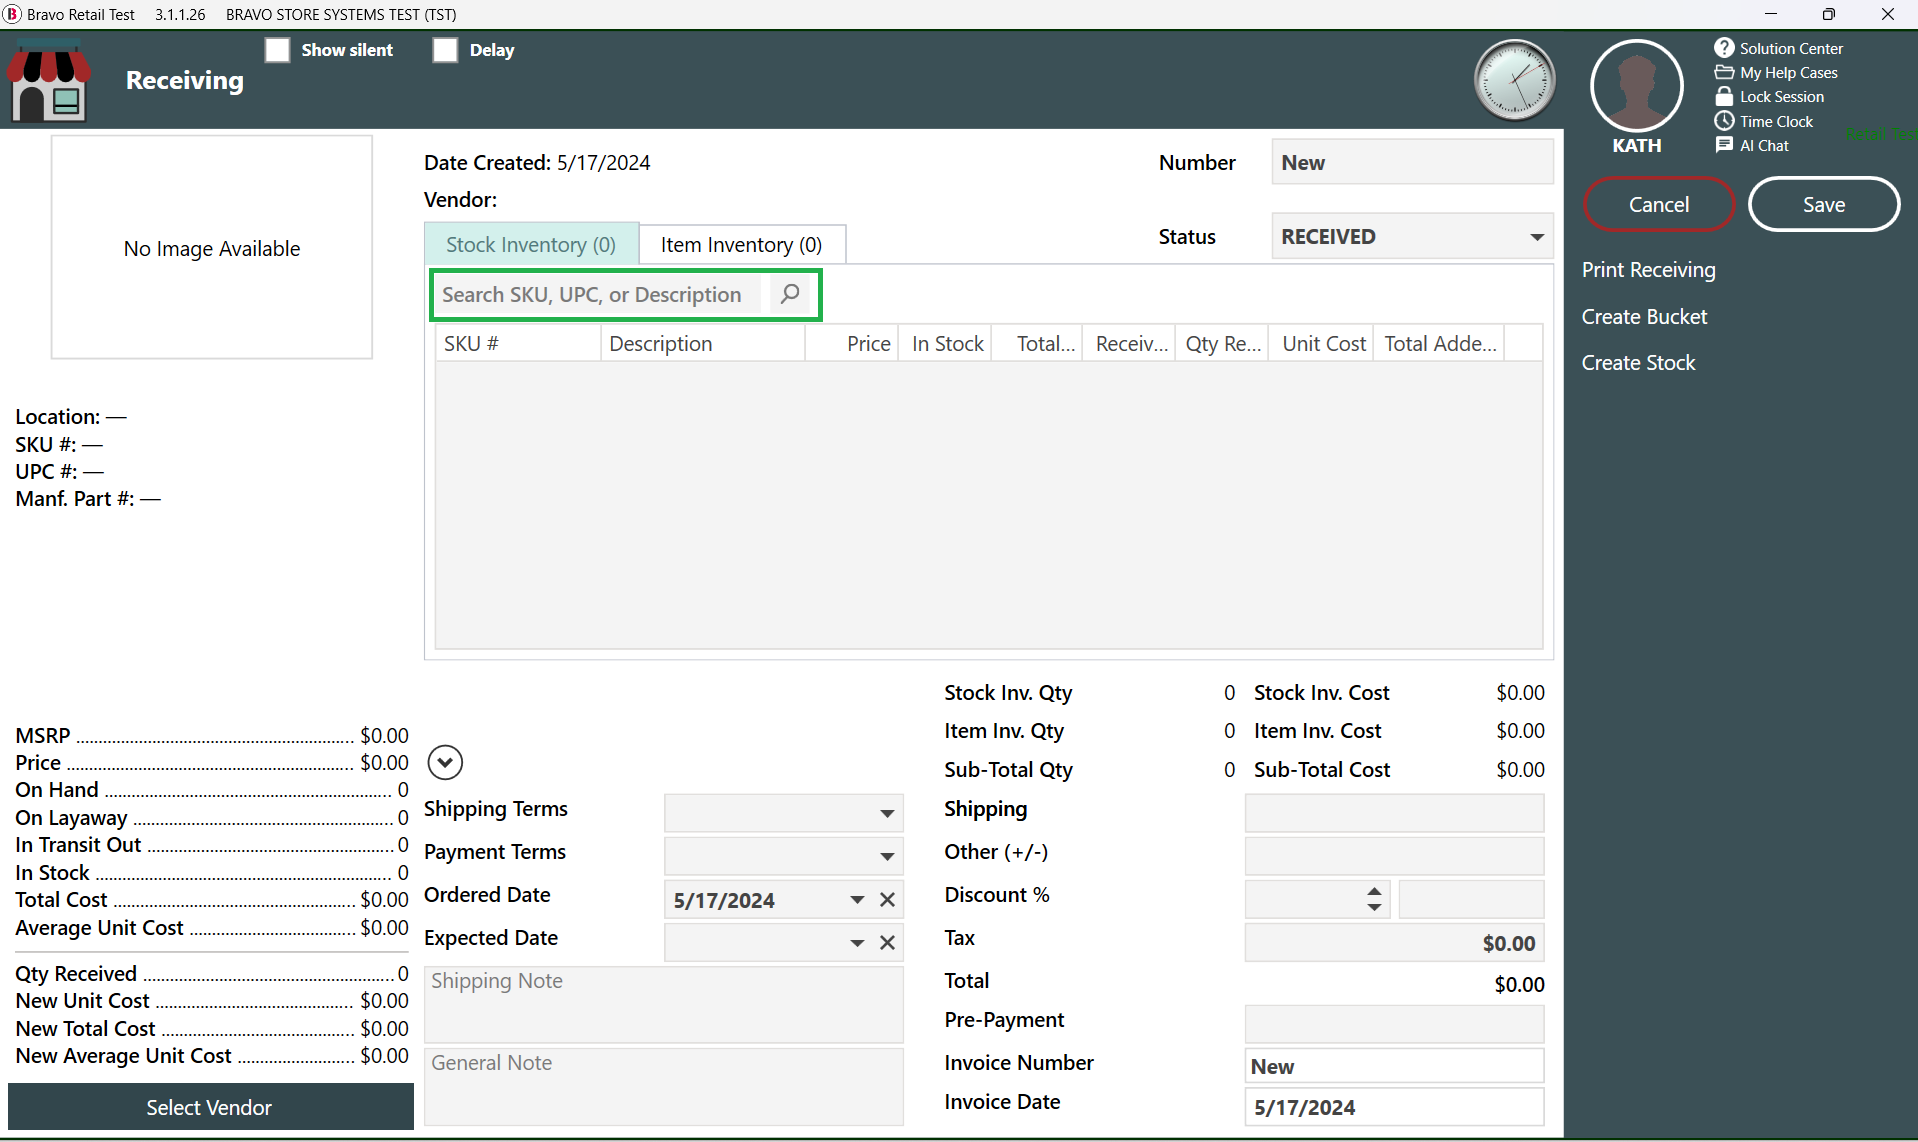
- After selecting the correct Stock, enter the Added Cost from the Vendor and the Added Quantity of items on the main grid.
- Bravo will update the SKU's total cost with the Added Cost and adjust the total quantity with the Added Quantity.
- Bravo will also recalculate the average cost per item if necessary.
- Once the cost and quantity have been added, click on Select Vendor
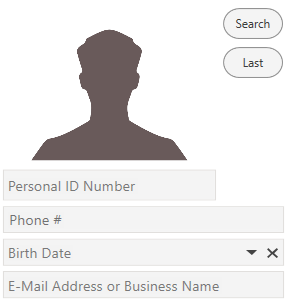
- E-Mail Address and Business Name are now combined for searches.
- Search for and Select a Vendor or if the vendor is not found, click on Add New Vendor.
To buy items expiring from your old system, create a vendor with your store's name.
- Entering order details is optional, however, the benefit of including this information is that it keeps everything organized in one place.
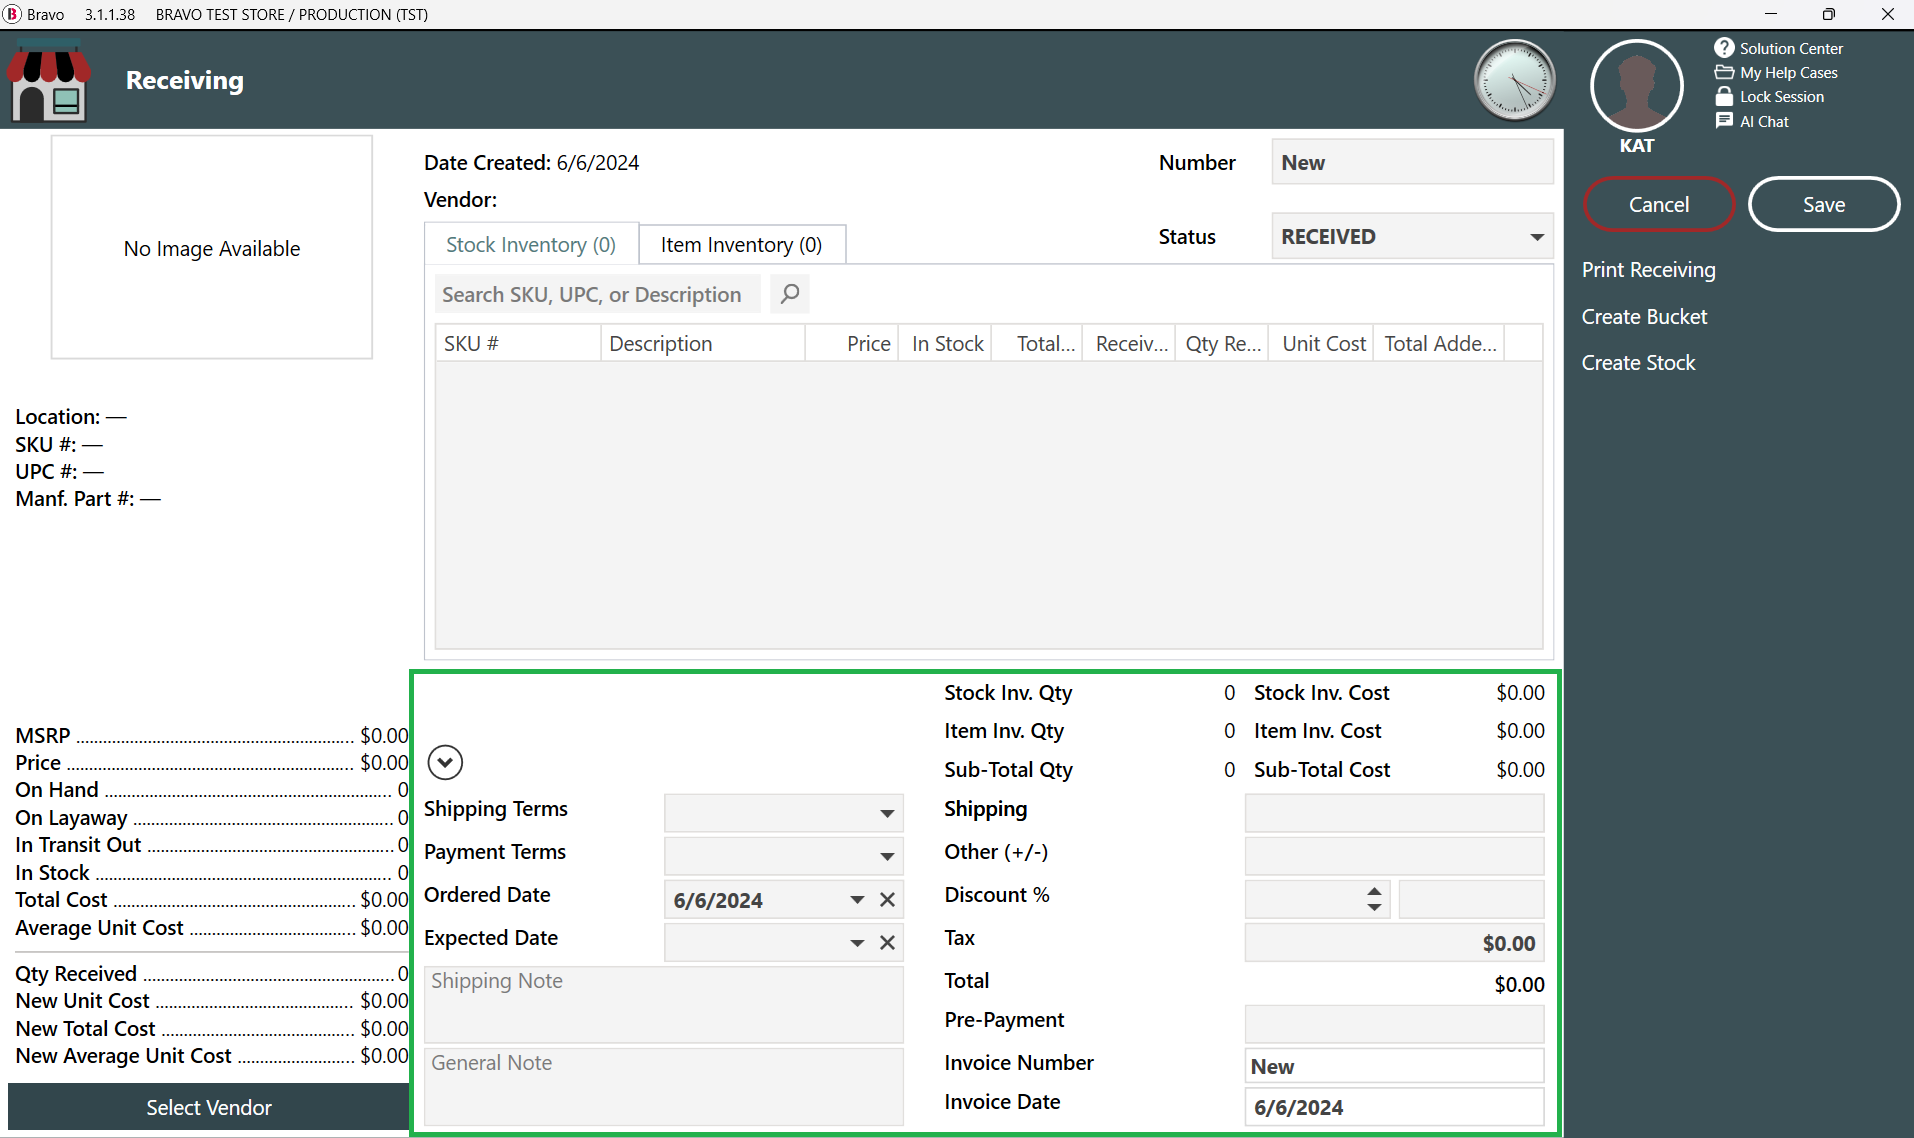
You can add to the same invoice number by selecting it from the drop-down after adding the vendor.
Remember, the Added Cost is the TOTAL cost. If your SKU cost is correct and you're just increasing the quantity, set the added cost to $0.00. This allows you to raise the SKU quantity without changing the total cost. Ensure you enter the correct number of items.
- Click Save.
- Items have now been added to your inventory.
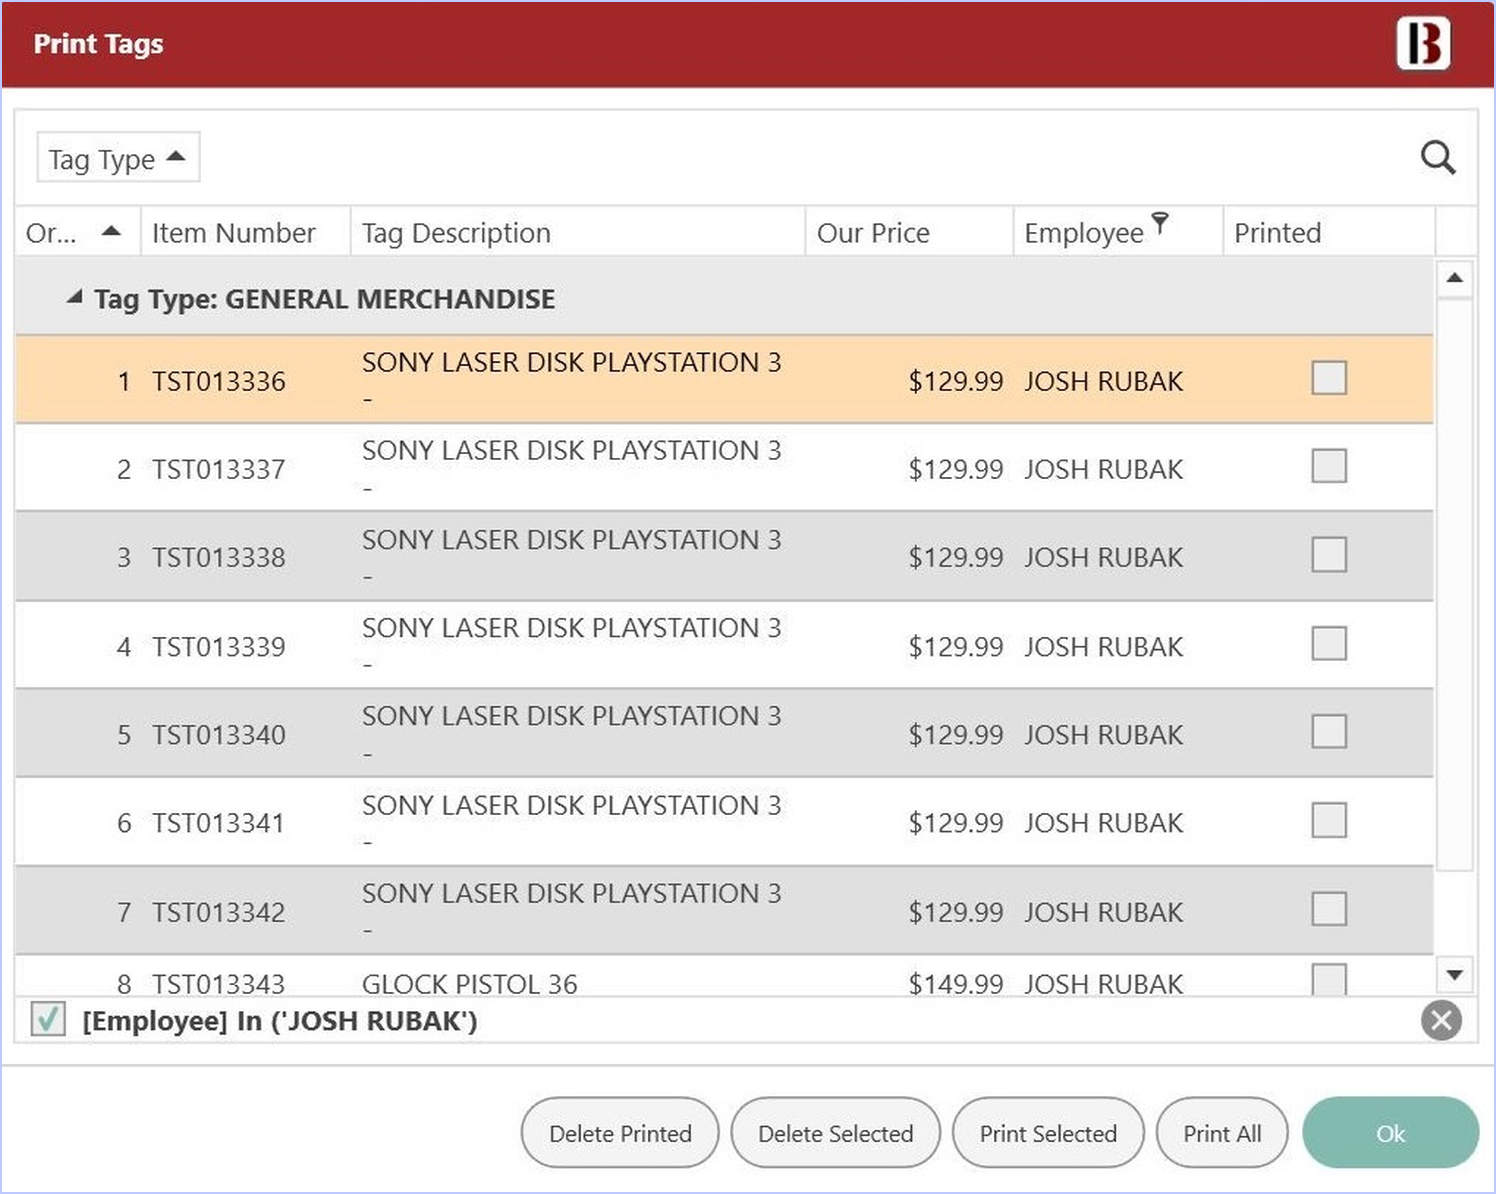
- The Print Tags queue will pop up, ready for you to print.
Writing Off SKUs
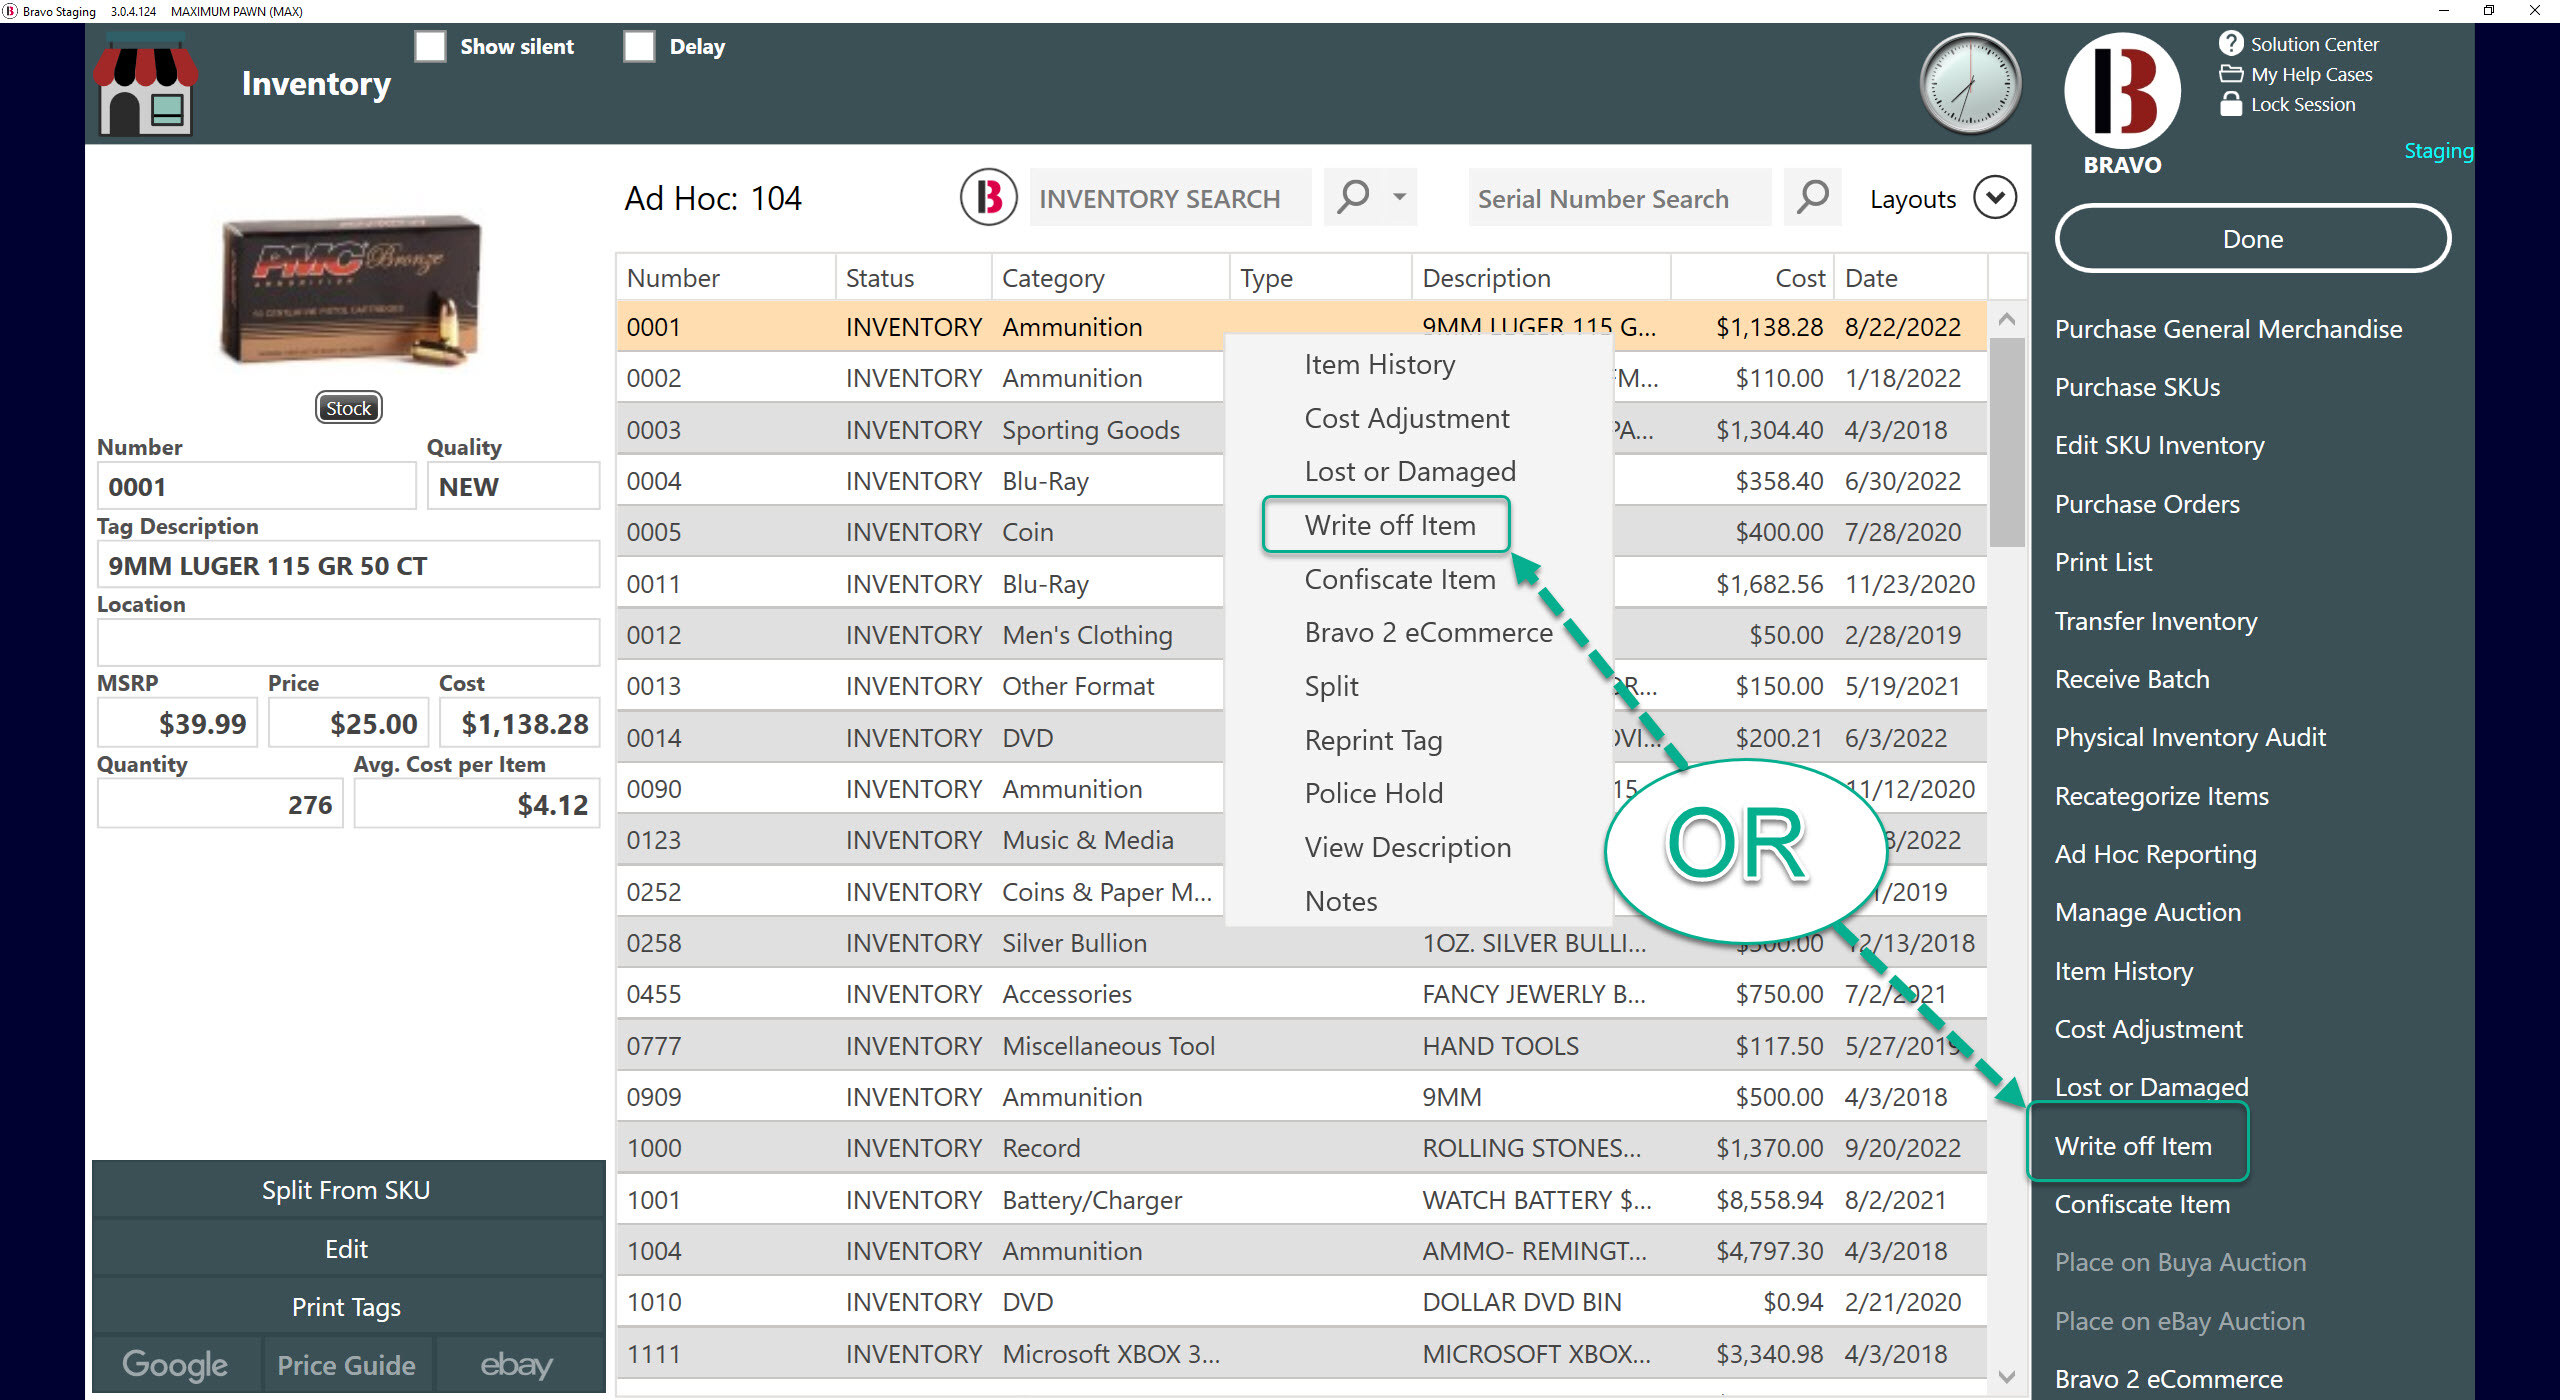
The quantity of a SKU can be decreased using the Write Off feature from the Inventory screen.
- Select Inventory from the Bravo Dashboard
- Search for the SKU number you need to reduce.
- Select the line that has the status of Inventory and select Write Off Item from the right hand menu or by right clicking on the item and selecting Write Off Item from there.
- On the Shrink Item window, you will need to select the reason as well as the Quantity to be written off.
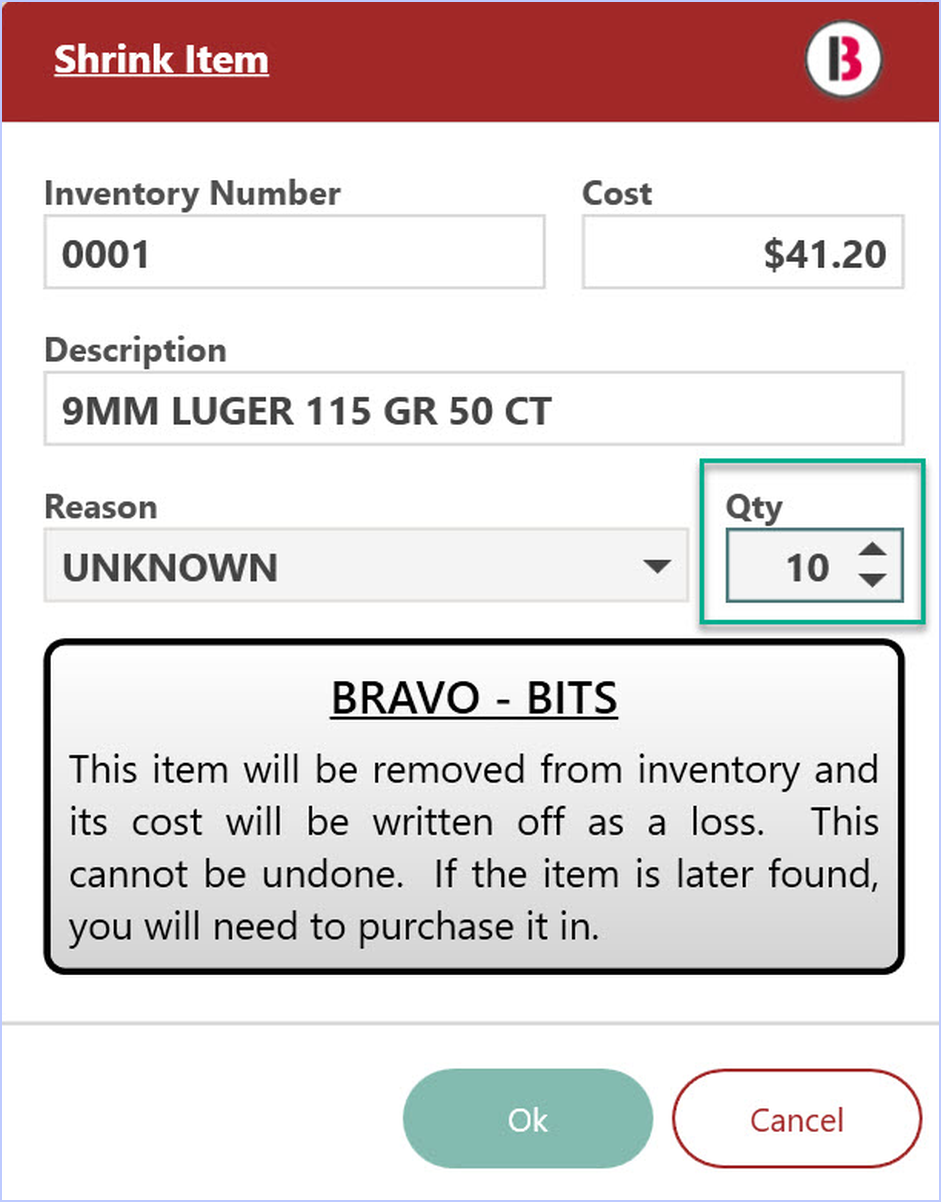
- Clicking OK will reduce the SKU by this quantity.
- This will reduce the item cost by the average cost based on the quantity being written off.
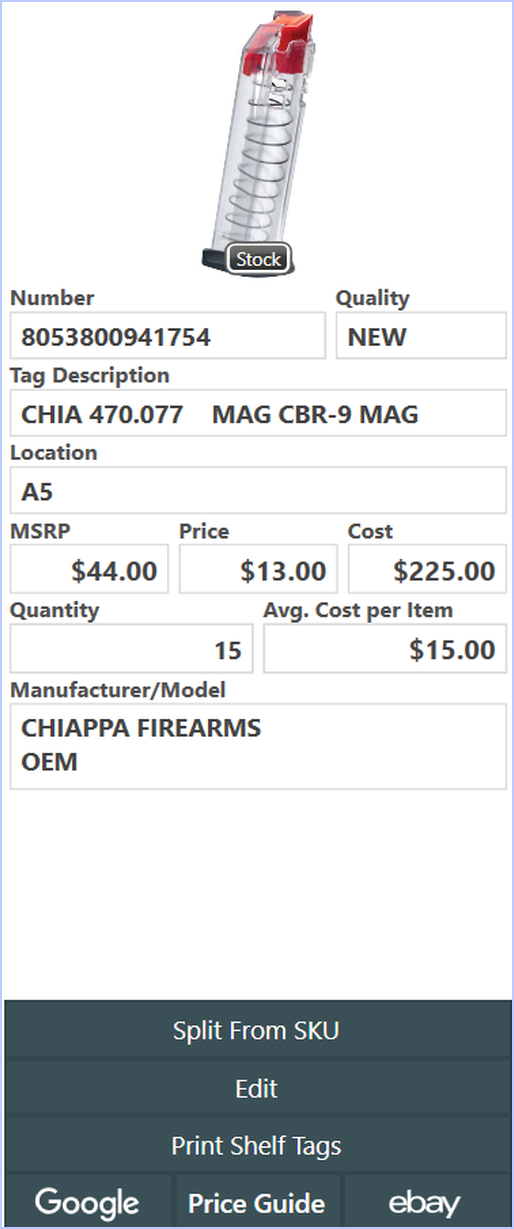
- If you wish to print a price tag, use the Print Shelf Tags button in the left panel when viewing a SKU in the Inventory screen.
- You will see a dialog window open asking for the Tag Type and Quantity that you would like to print.
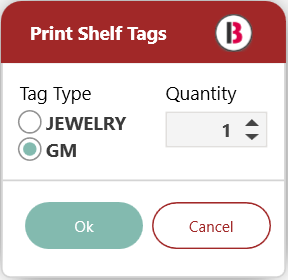
- This will print the quantity of tags desired.
- This same method can be used during purchasing or also when splitting out SKUs to print price tags.
Selling from a SKU
- To sell a SKU, scan the UPC/Barcode, enter the Company SKU Number, or enter one of the SKU's Tags in Smart Search
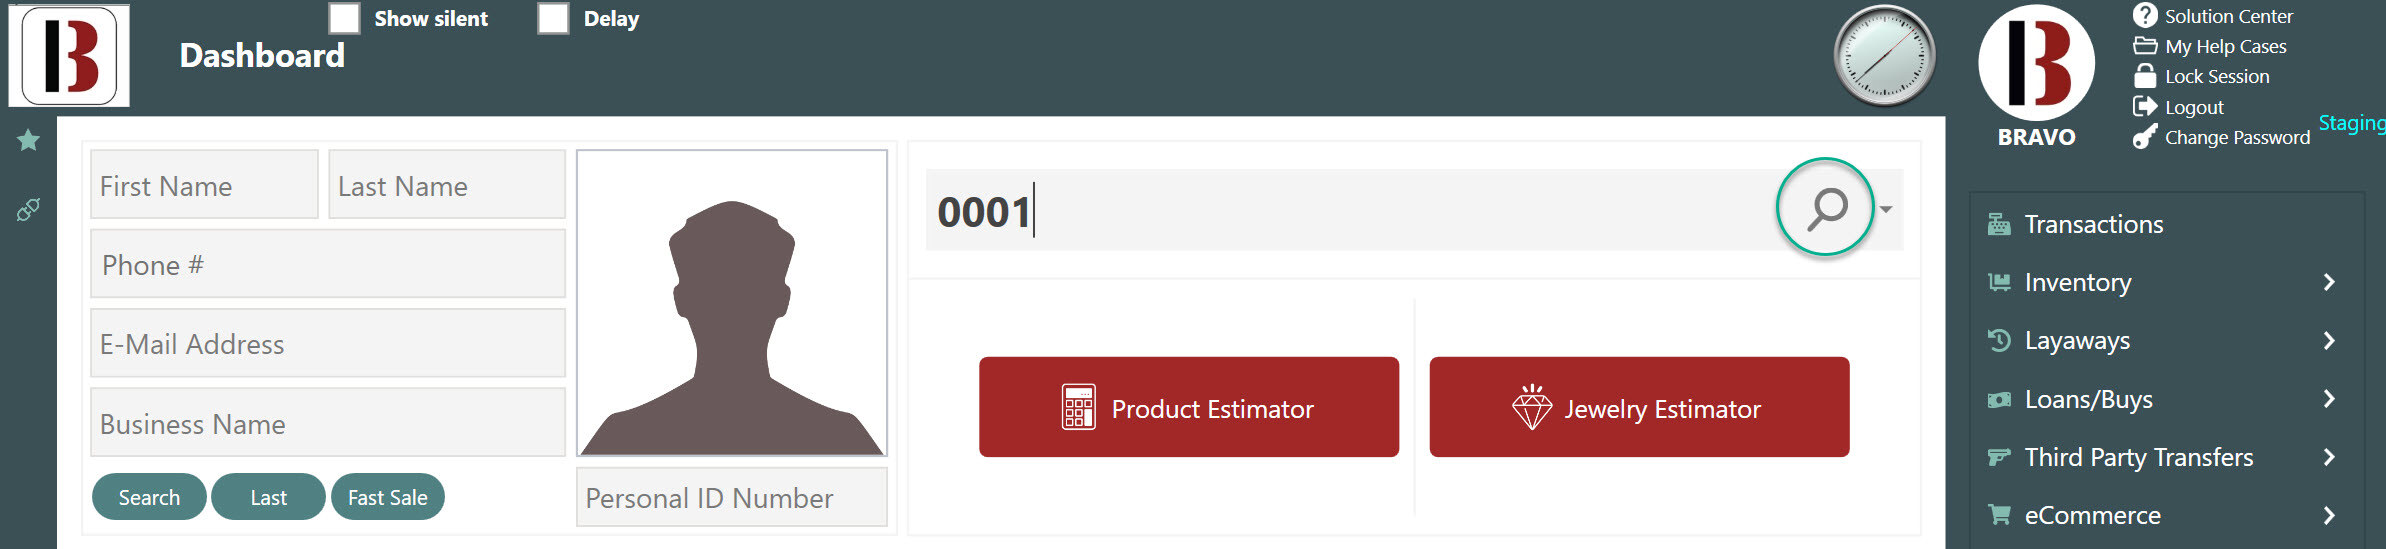
- This will display the item for sale. You can keep scanning to add more items, increasing the Total Price by the Price set in System Configuration.
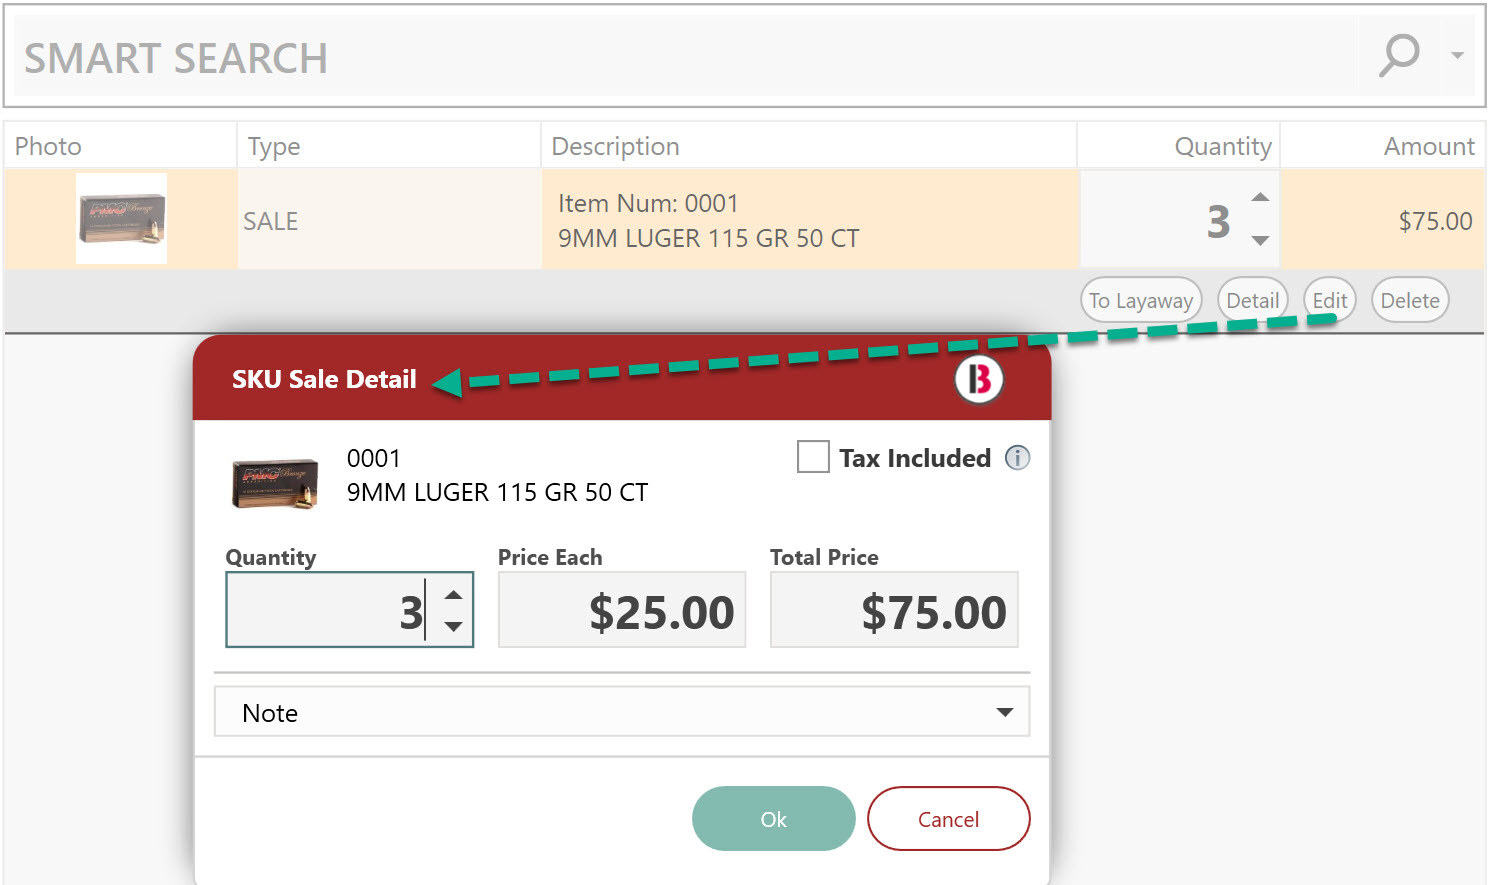
- Clicking Detail will bring up the SKU Detail Dialog, showing the settings from System Configuration.
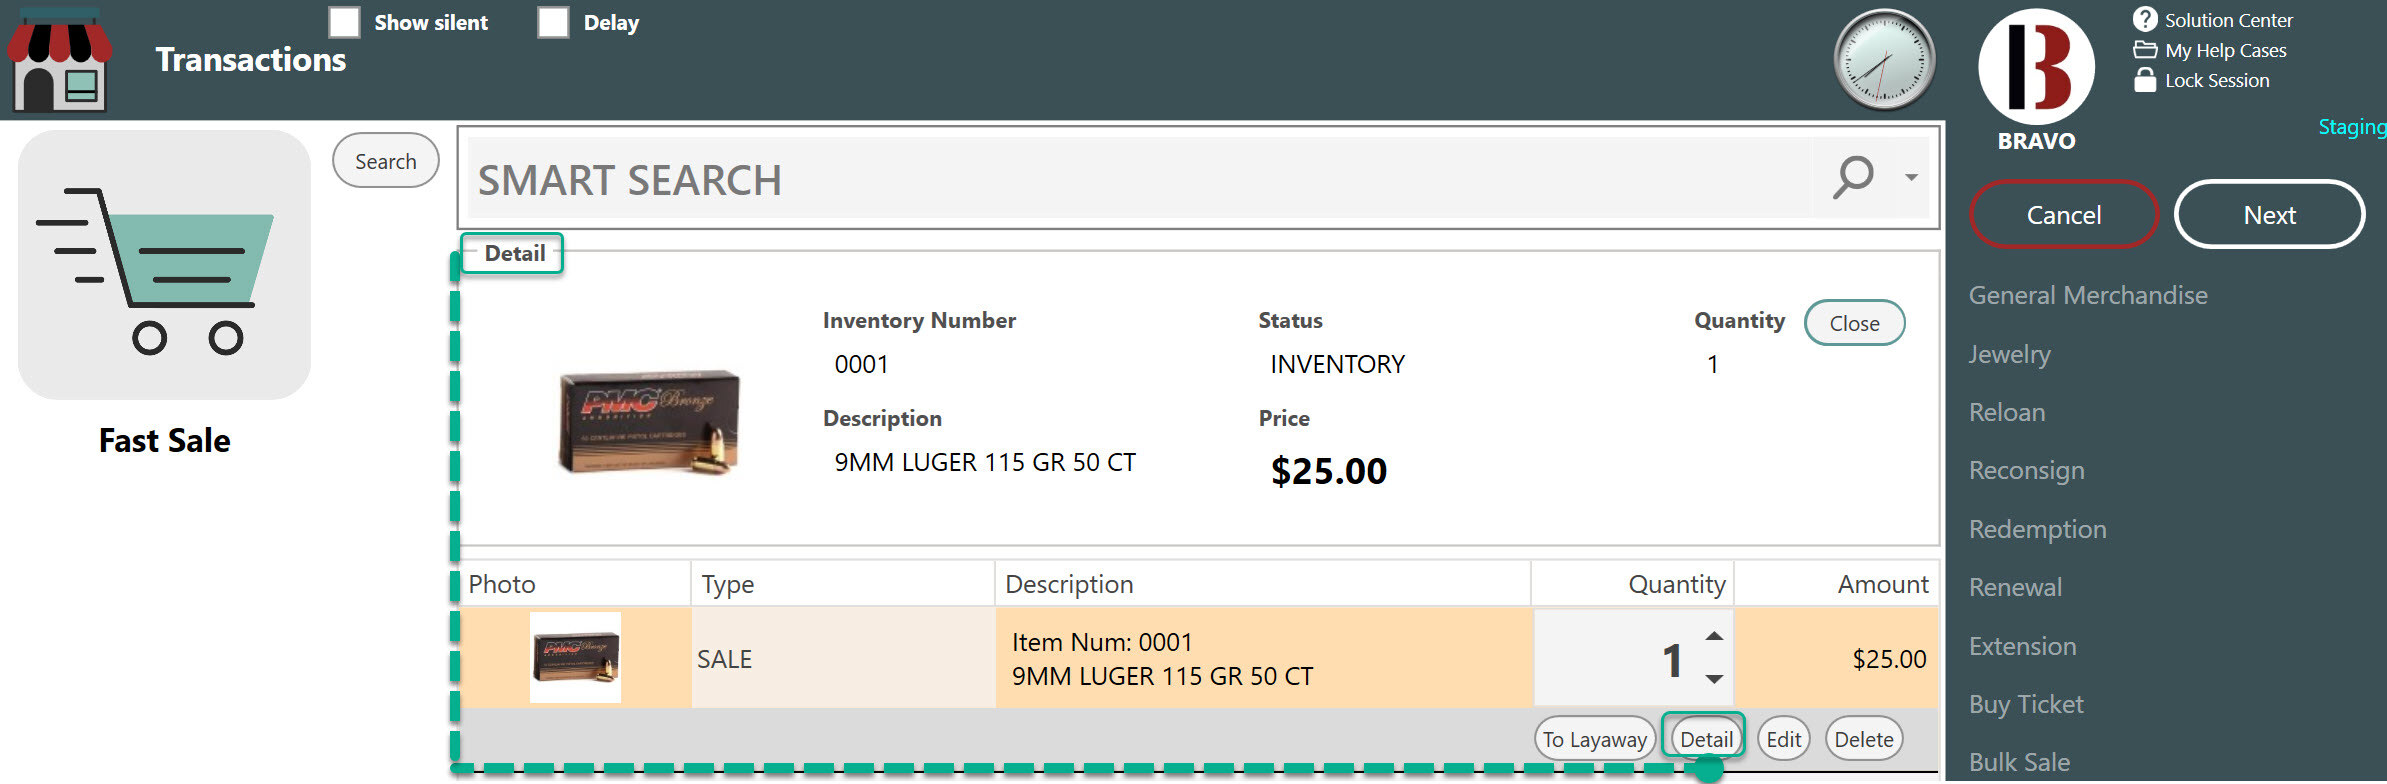
- On the transaction line you can change the quantity of items to sell by typing it in or by using the scroll wheel.
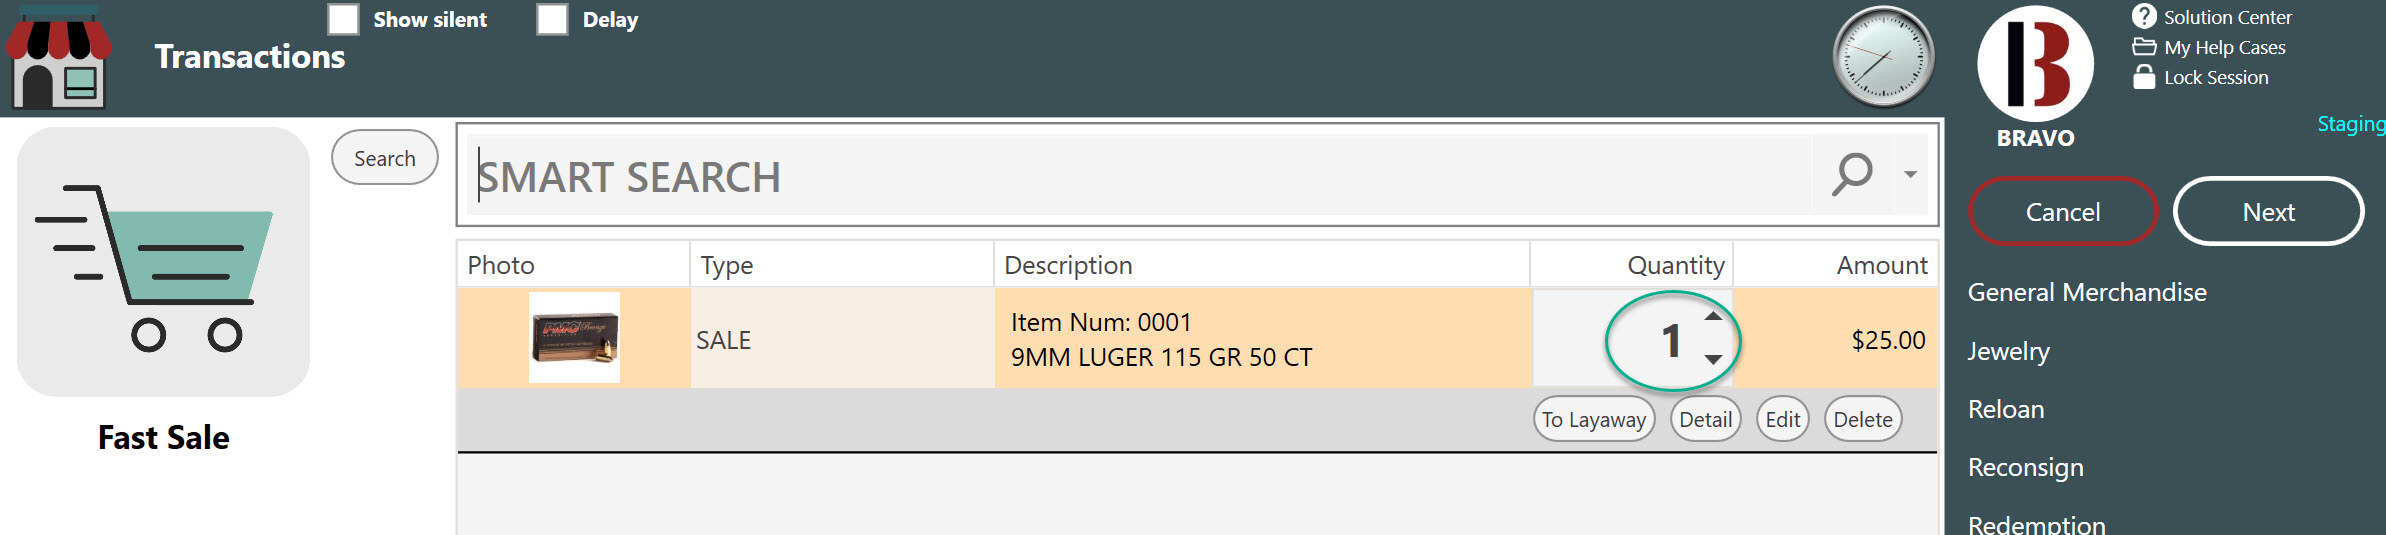
- You can edit the price of each or the total after clicking Edit.
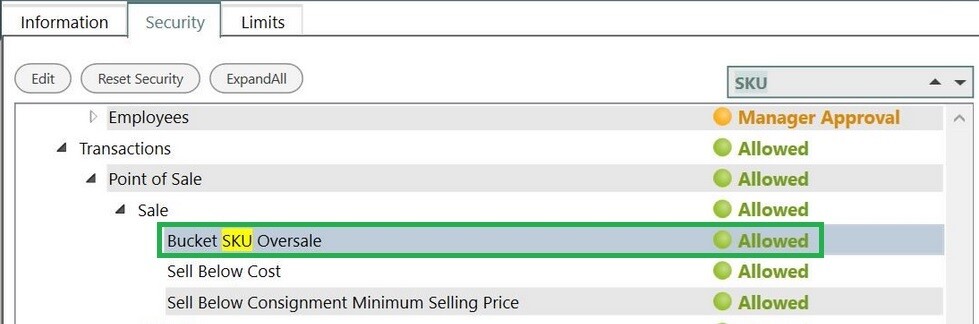
Oversale, or selling more than the available quantity, is possible with the right security settings.
- When items sold exceed the quantity on hand, both quantity and cost will be zero, they won't go negative.
- To prevent this, adjust the SKU quantity to match the actual stock.
- This can be easily achieved by using purchasing to update the SKU quantity and cost accordingly.
Product SKUs are currently not available to be sold online.
Layaway for SKUs
- Layaway on an SKU works the same as a regular layaway, except the quantity is entered.
- Pull up the SKU in the Smart Search and on the transaction line item click To Layaway.
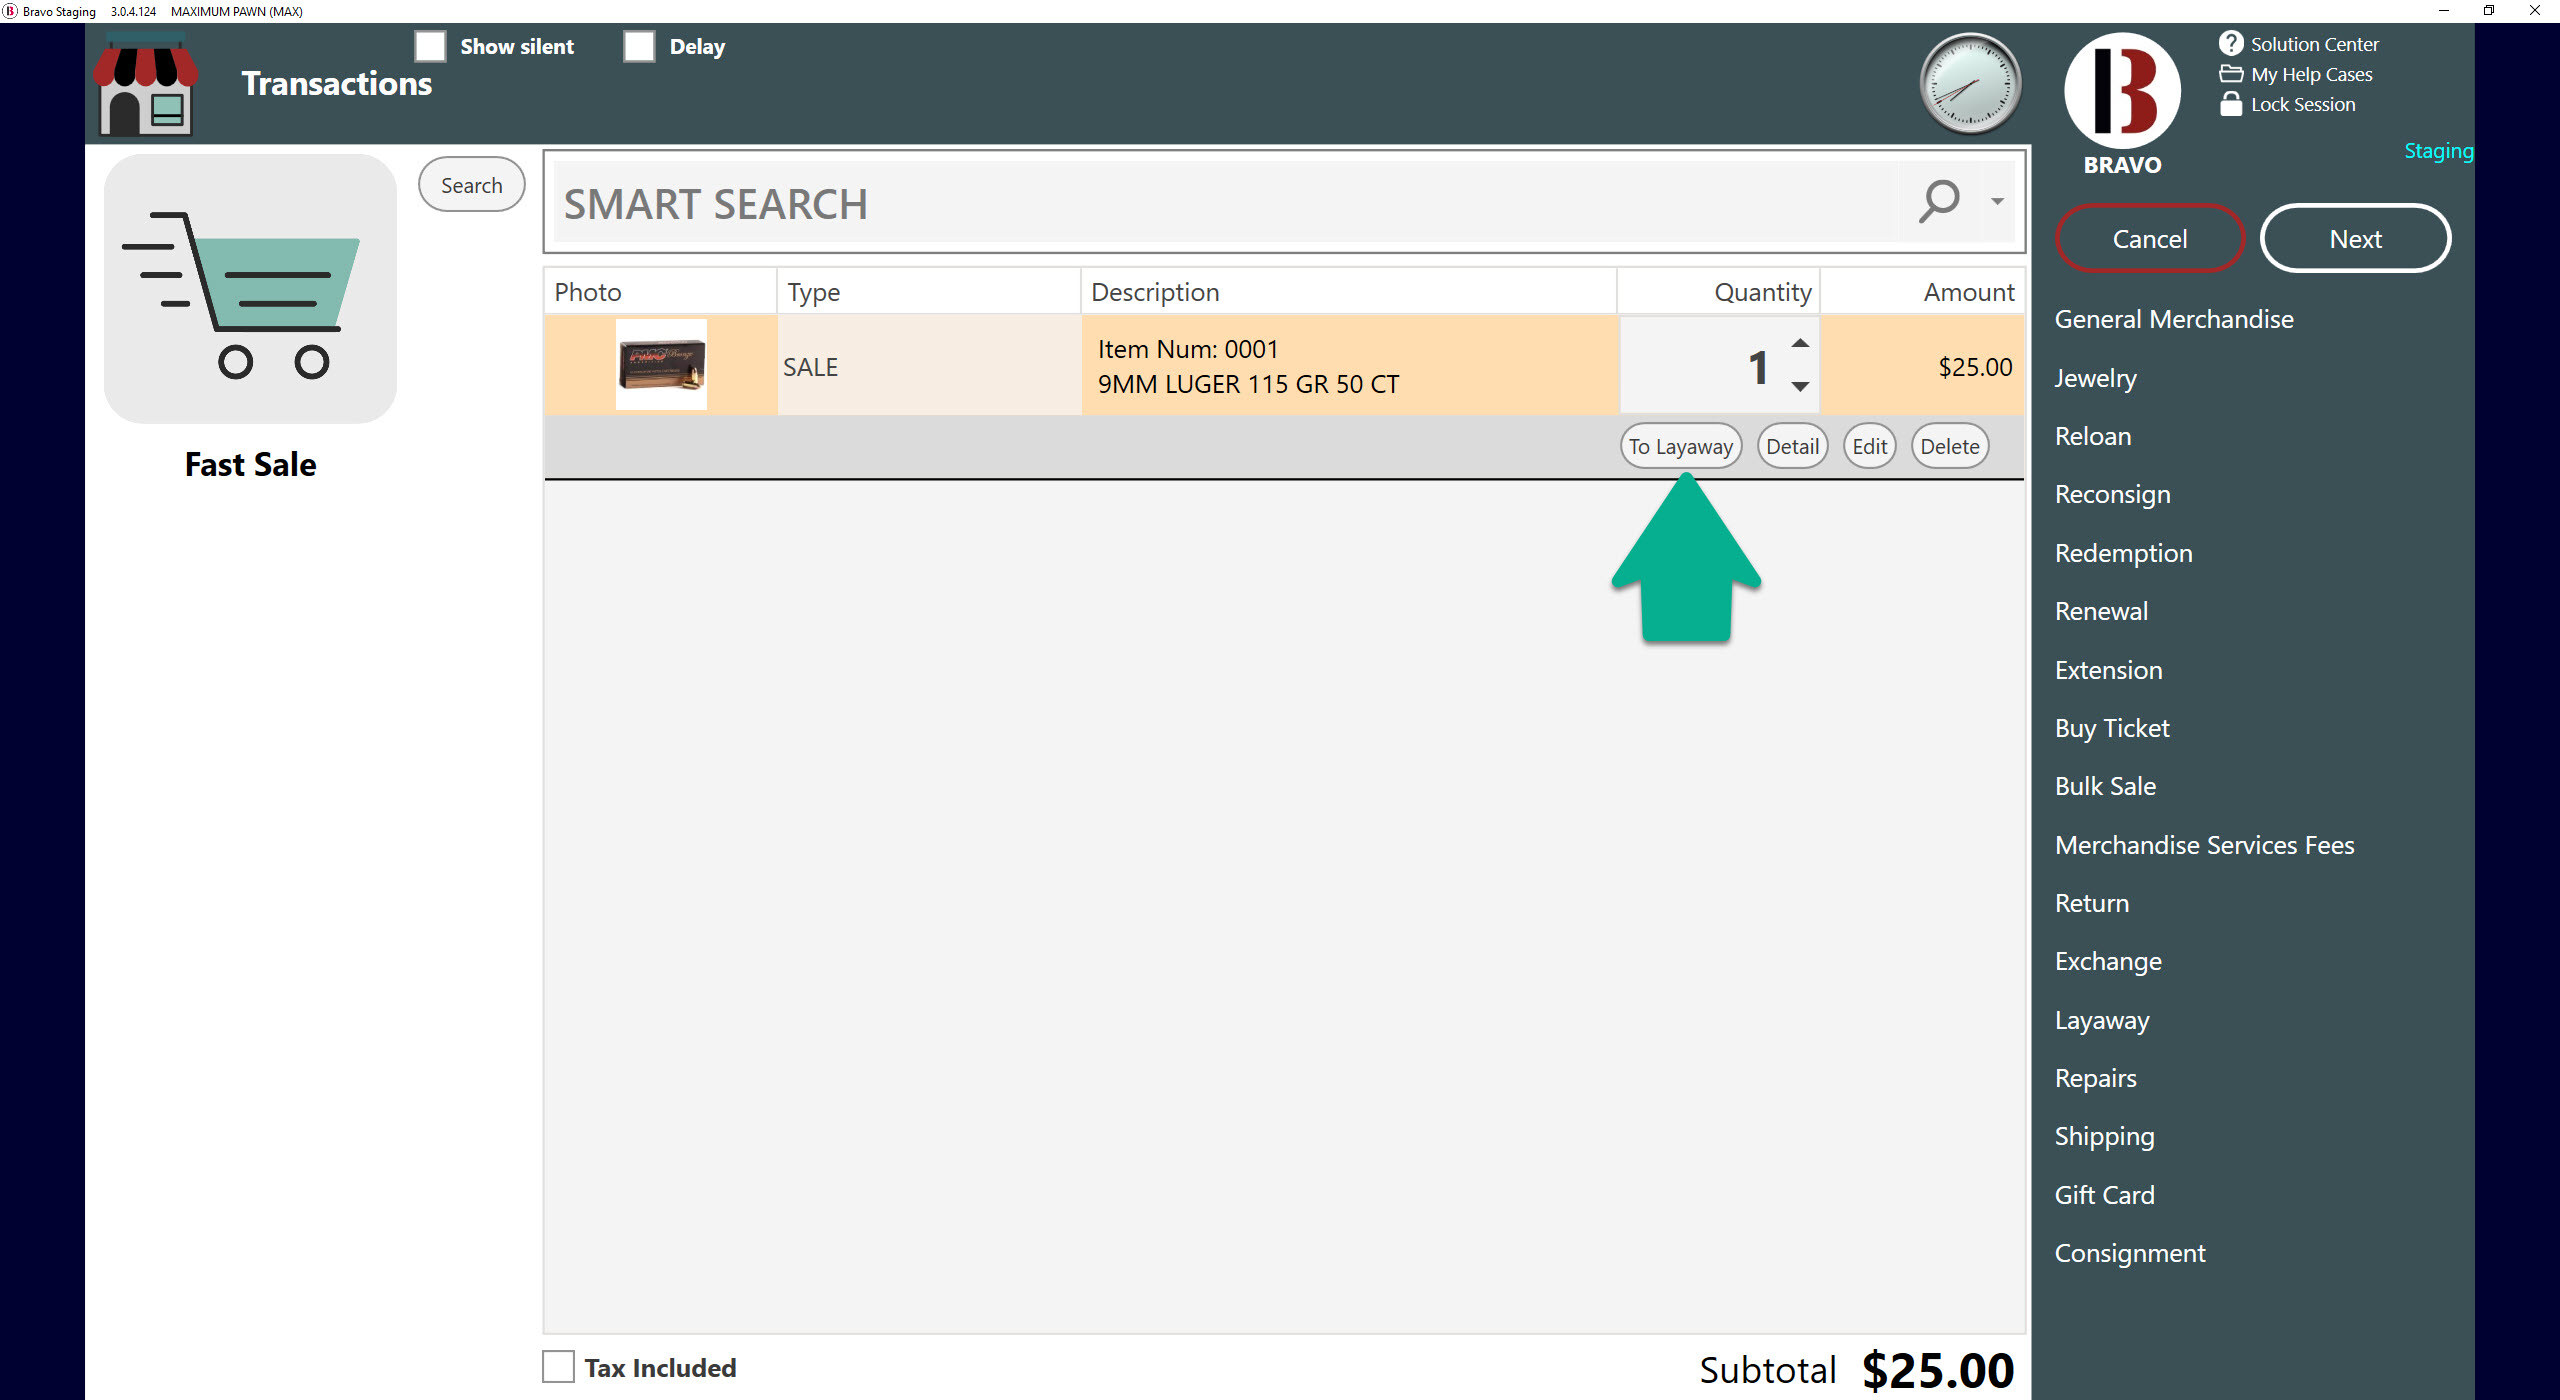
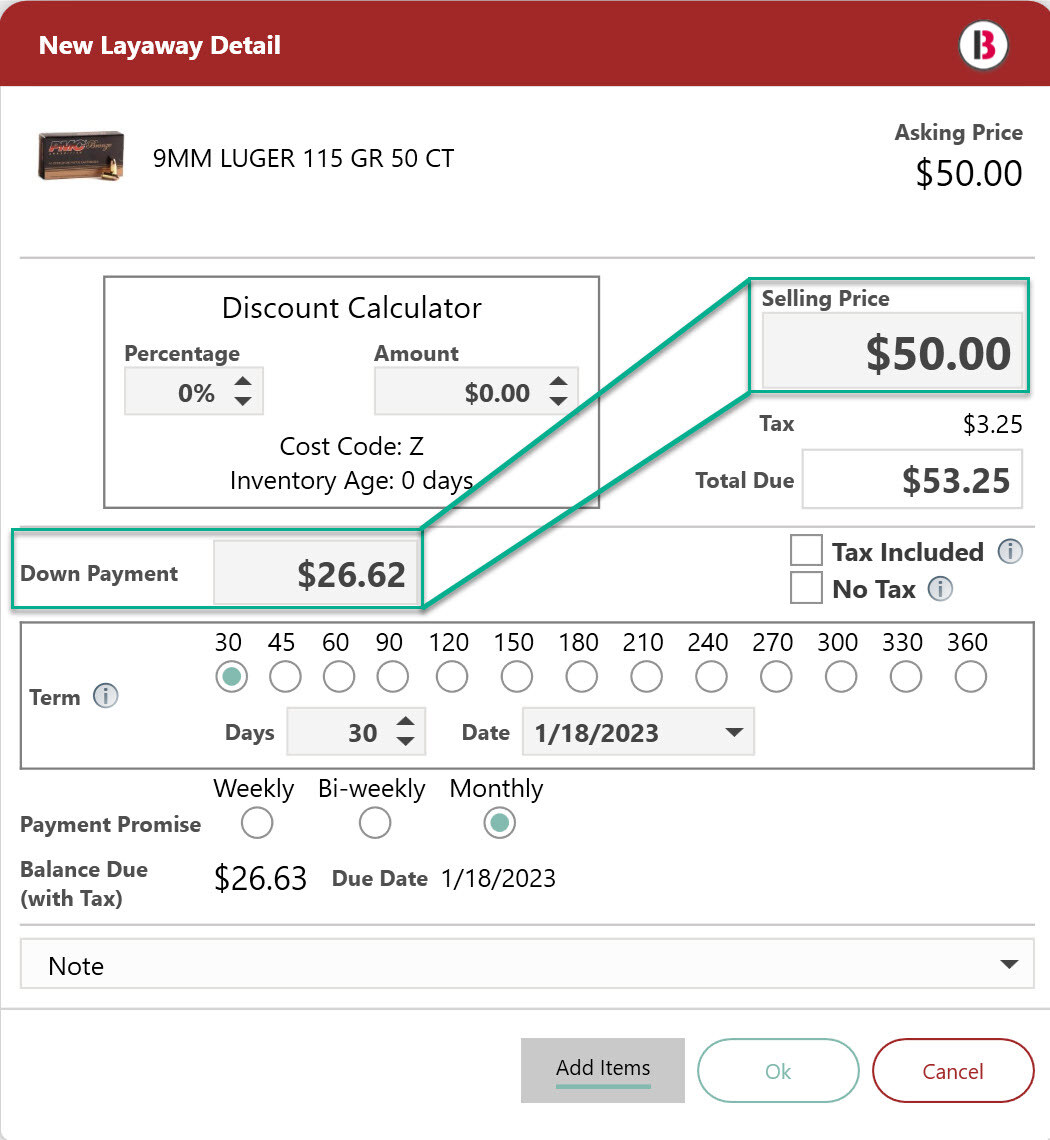
- The Layaway will default to a quantity of 1 for the SKU.
- To increase the quantity, click on Add Items from the bottom of the New Layaway Detail window.
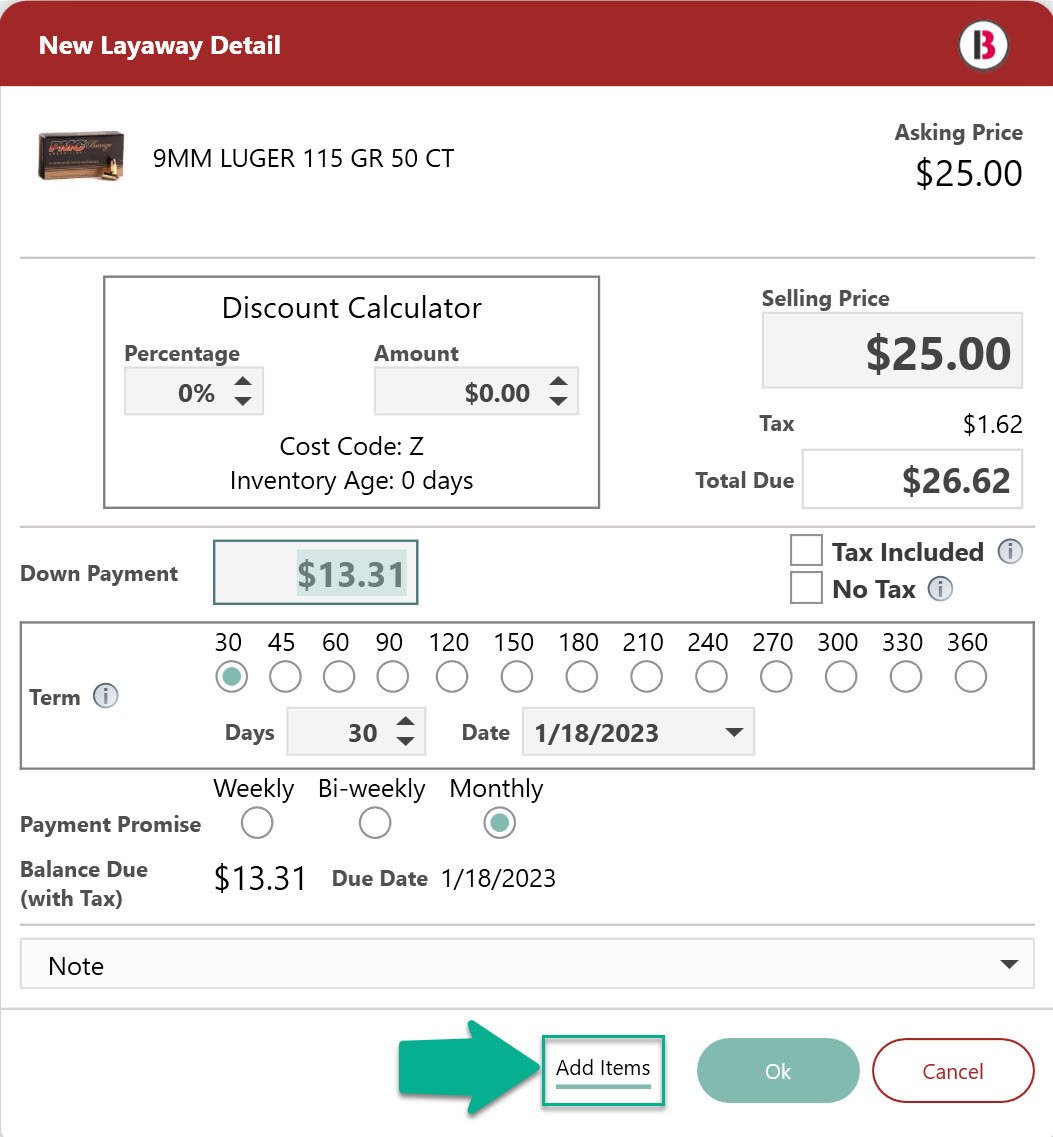
- Enter the quantity and click OK.
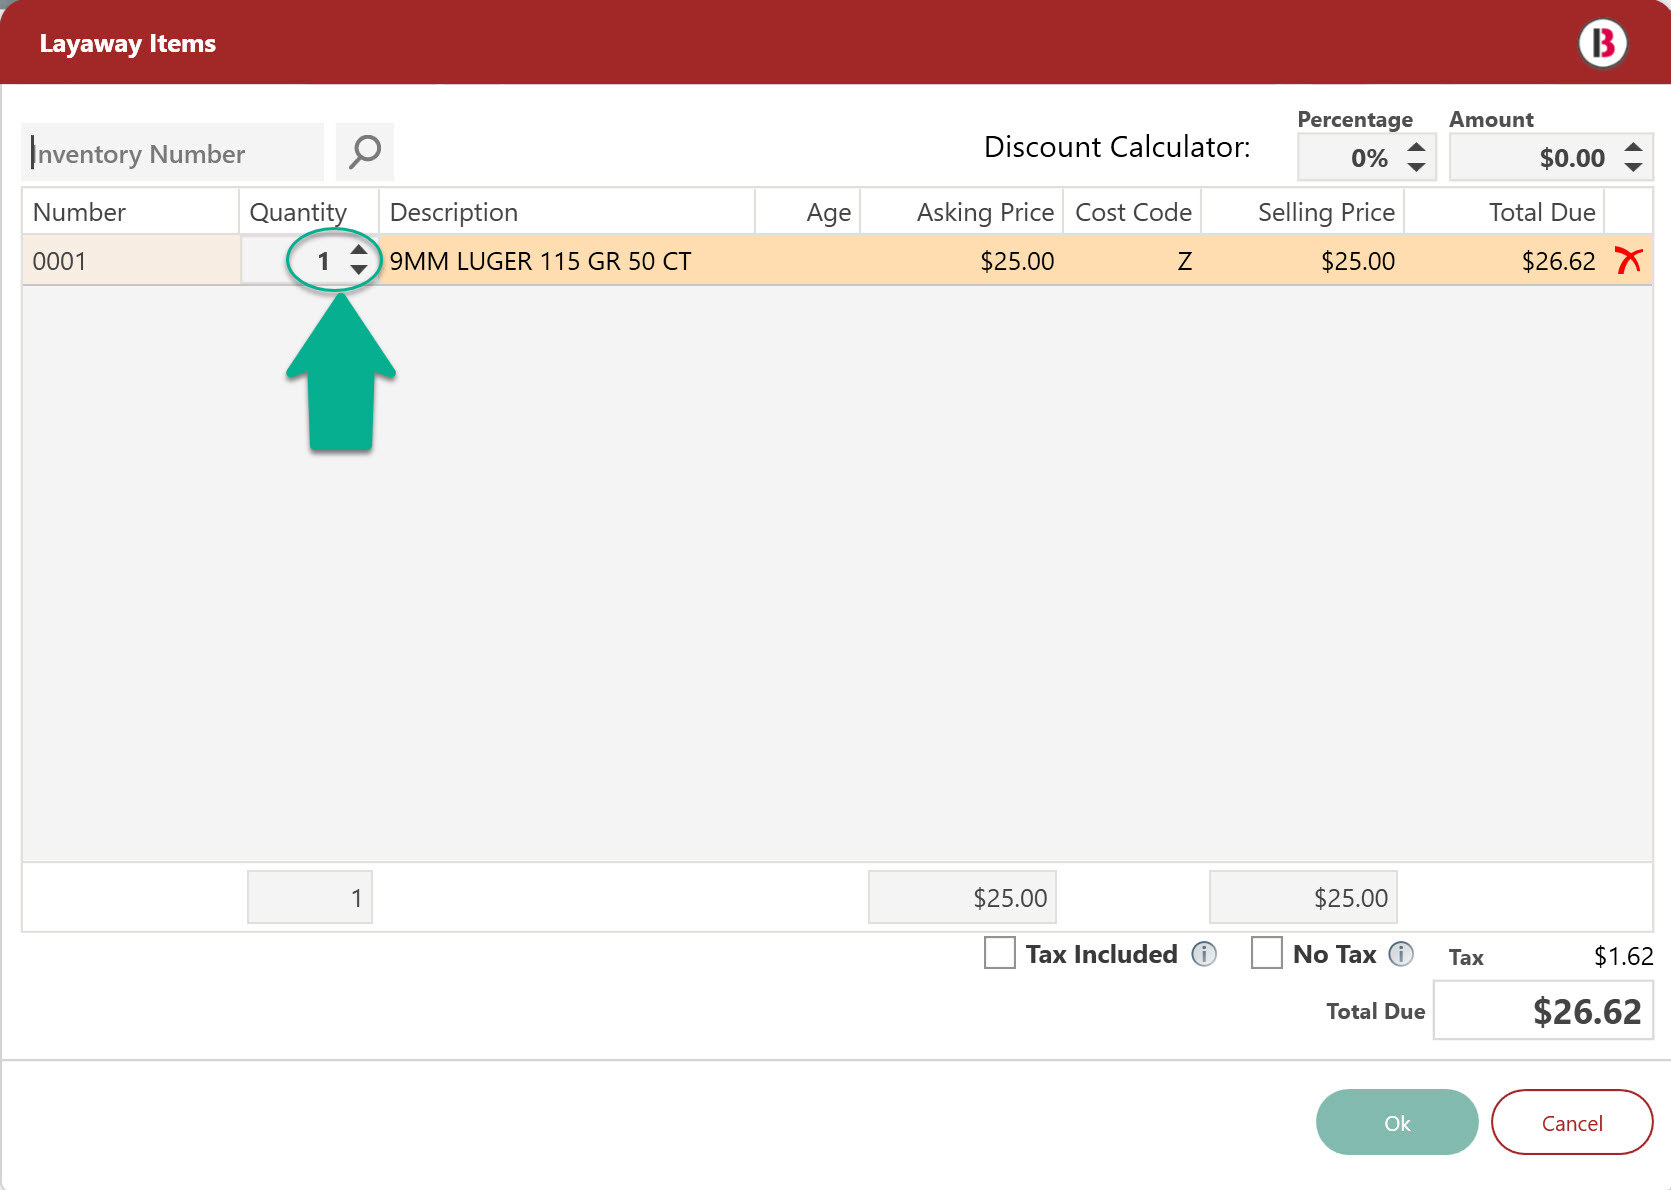
The Selling Price and the Down Payment will automatically adjust for the correct quantity.
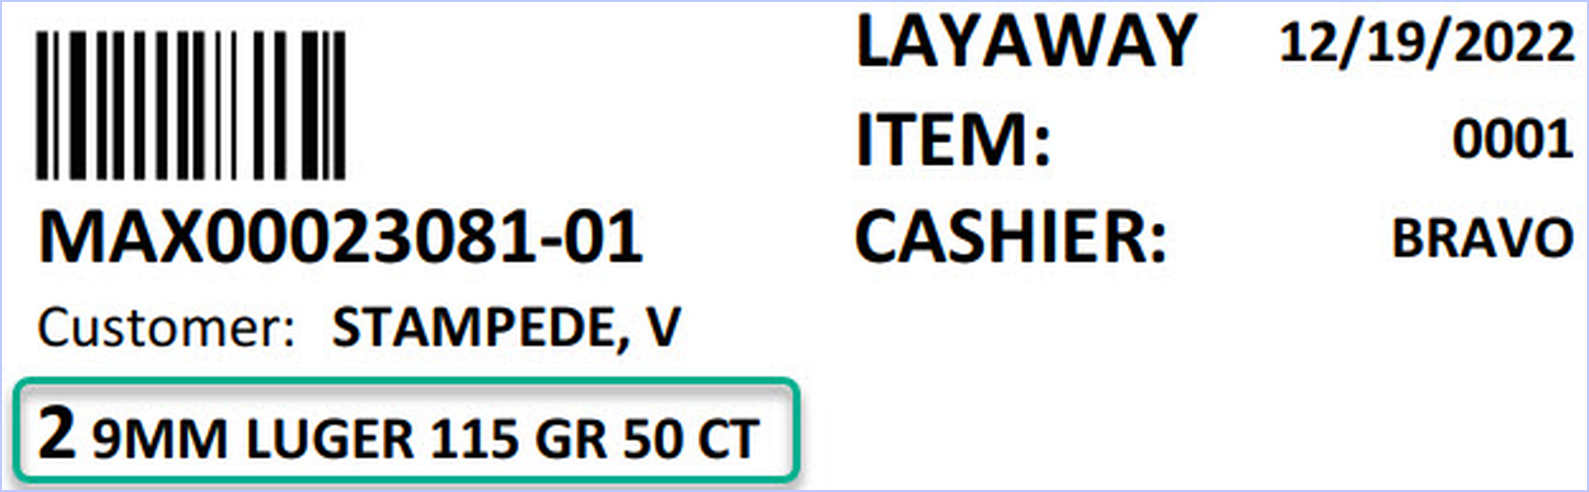
- All the items are assumed to be on the same layaway, bundled together, with the same layaway number.
- One layaway tag is printed for all with the quantity noted prior to the Description of the item.
- To have separate layaways with different terms or payment schedules for the same SKU, enter the SKU again in smart search. This will create a new layaway for the same SKU number.
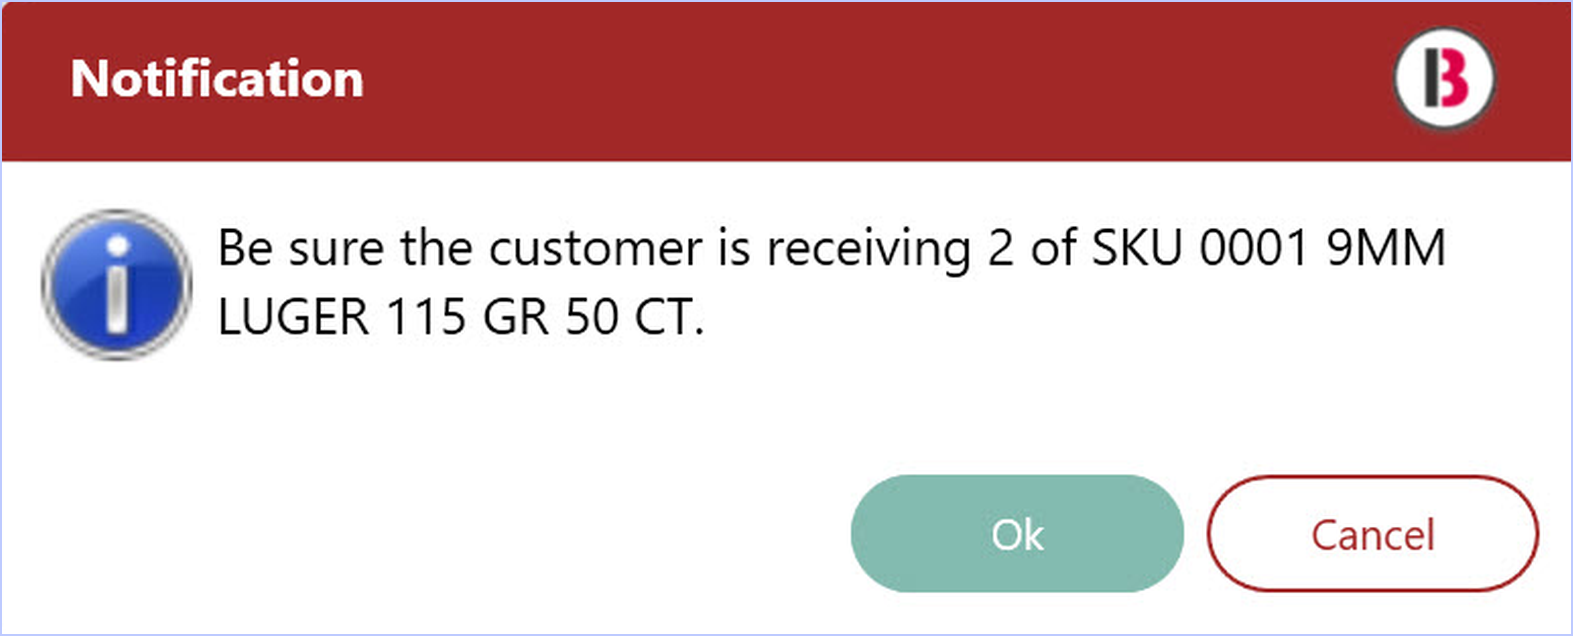
- On the final payment of a SKU layaway, when retrieving the layaway items to give to the customer, the system will prompt the user to confirm the quantity in the Scan Items screen.
Returning SKUs
- Whether or not a SKU can be returned is dependent on the number of items that have been returned compared to the number of items originally sold.
- Returns of a SKU must use the customer’s receipt to since we can’t determine this by just scanning the SKU.
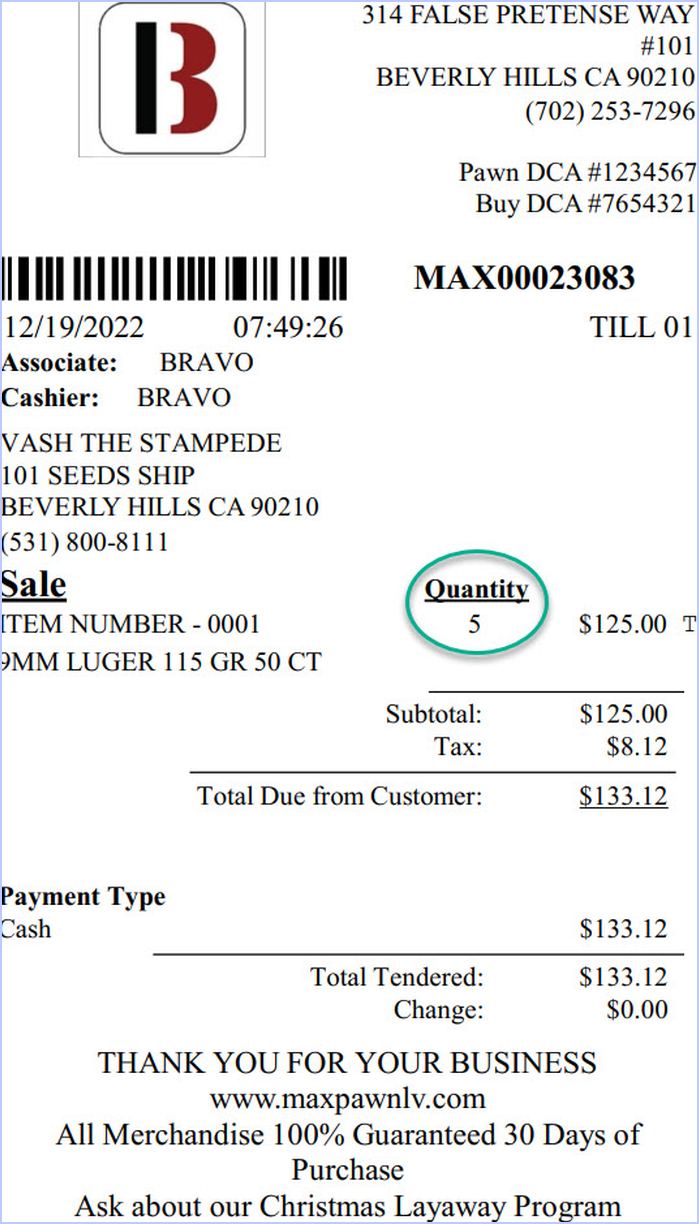
- When returning a SKU, you are prompted for the number of items to return in the SKU Return Detail dialog window.
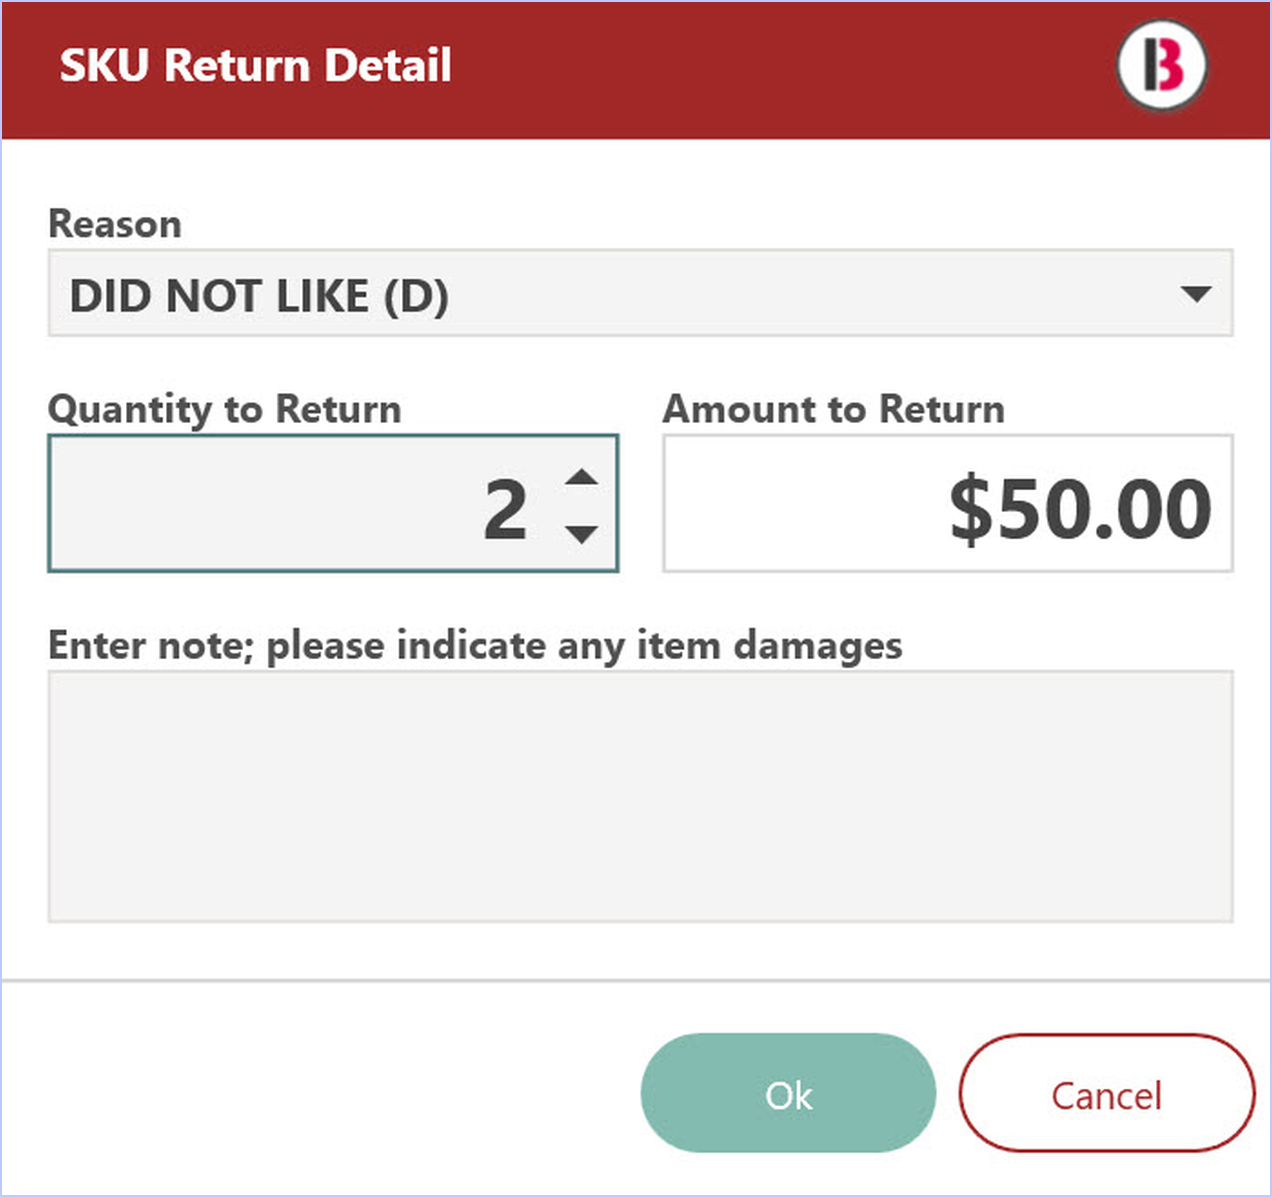
- The number than can be returned is limited to the number of purchased items.
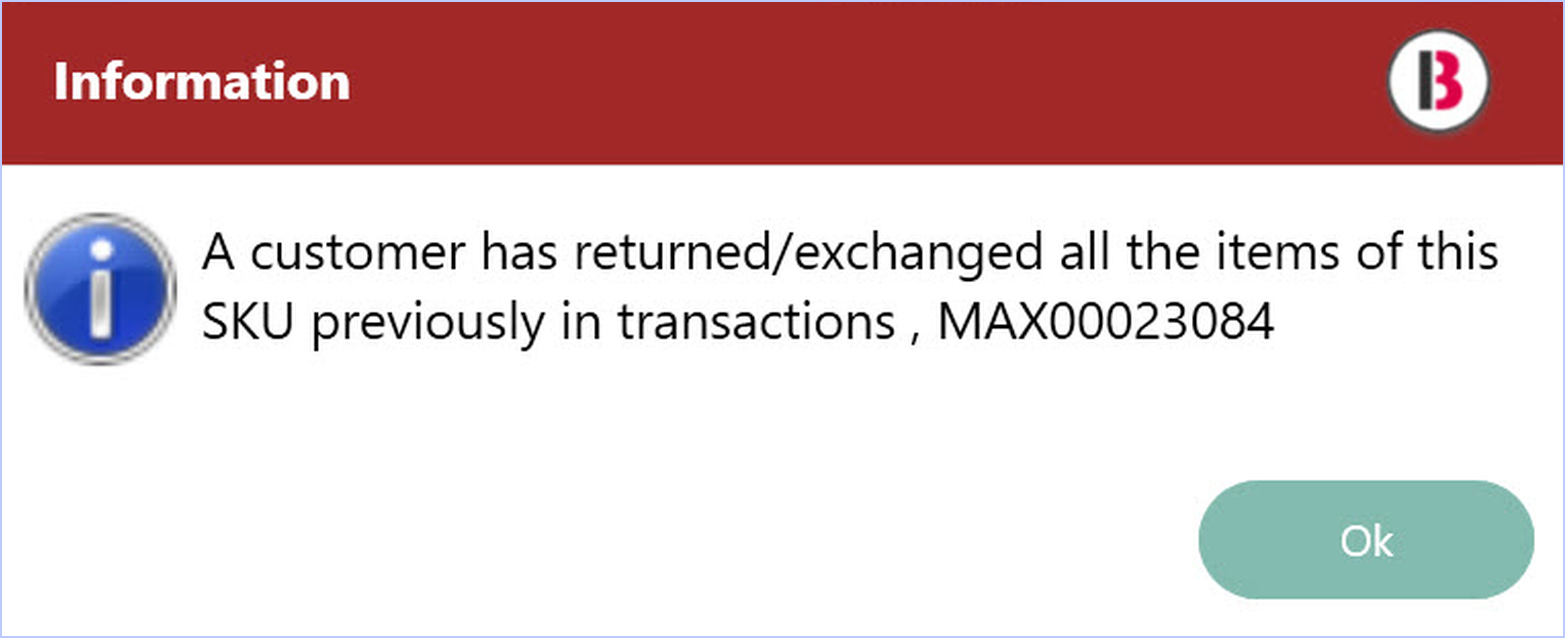
- A customer may return 2 of 5 original items in one transaction, and then come back later and return the remaining 3, however, they cannot return more than the total from the sale.
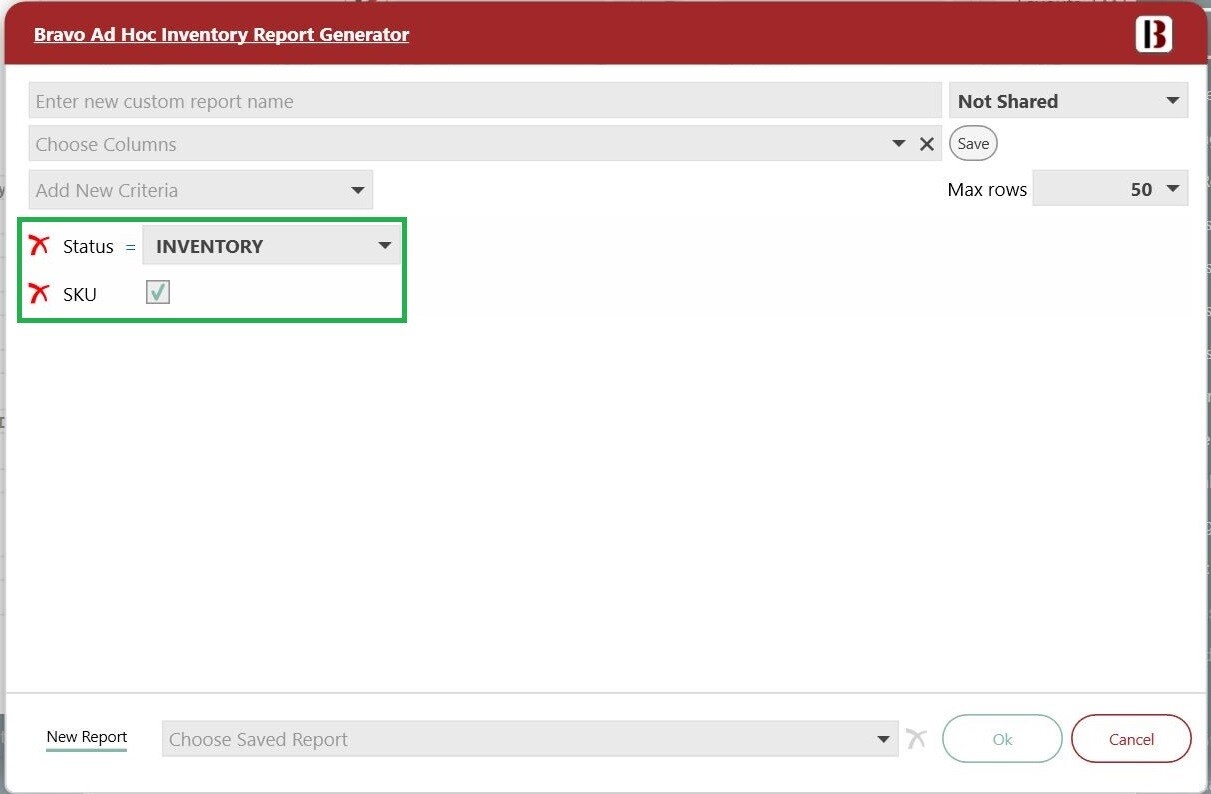
SKUs and Ad Hoc Reporting
- From the Dashboard, select Inventory and then Ad Hoc Reporting.
- To get a list of all the active SKUs and the current SKU quantity, select the Criteria SKU Quantity and the Criteria Status=Inventory.
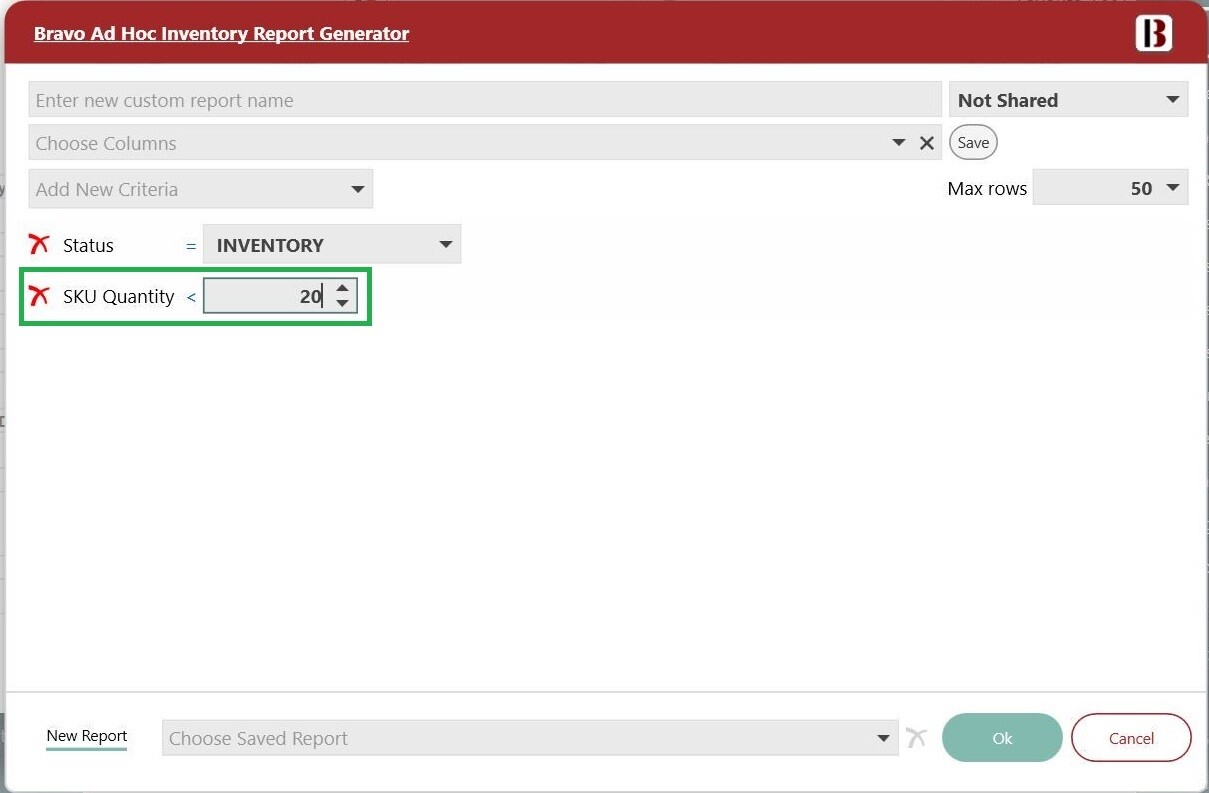
- Alternatively the Criteria SKU Quantity can be used to filter the report, for example on sales less than a certain quantity.