Last Updated: 3/26/2025
All stores can now transfer inventory, including SKUs and Firearms, out to a Vendor for;
- Auction
- Inventory repair
- Other off-site actions
Items transferred off-site can then later be marked as Sold.
Instructions
- To transfer inventory out of the store, from the Dashboard, select Inventory then Transfer Inventory.
- Select the Transfer Type drop-down on the left side of the Transfer Inventory screen.
- Select Store to Vendor, then search for a Vendor.
- Scan or enter the item numbers to be transferred.
- Then select Save to complete the outbound transfer.
- Firearms will be disposed of to the selected Vendor.
A Batch Packing List will print from the Reports printer. Firearms will be marked as “Transferred” in the ATF A&D book on the batch save date, which will be shown on the Batch Packing List as the Date Sent.
Please note that Items on Consignment cannot be transferred off-site to vendors.
- Select Receive Batch from Inventory > Stock Management when receiving items back from the vendor or when marking the items as sold.
- Select the Receive Batch drop-down in the upper-right corner, then select the relevant Batch Number

- For items that were sold while in the vendor’s possession, select an item from the listing.
- Then select Sale on the right panel. Alternatively, you may right-click an item from the listing and select Sale.
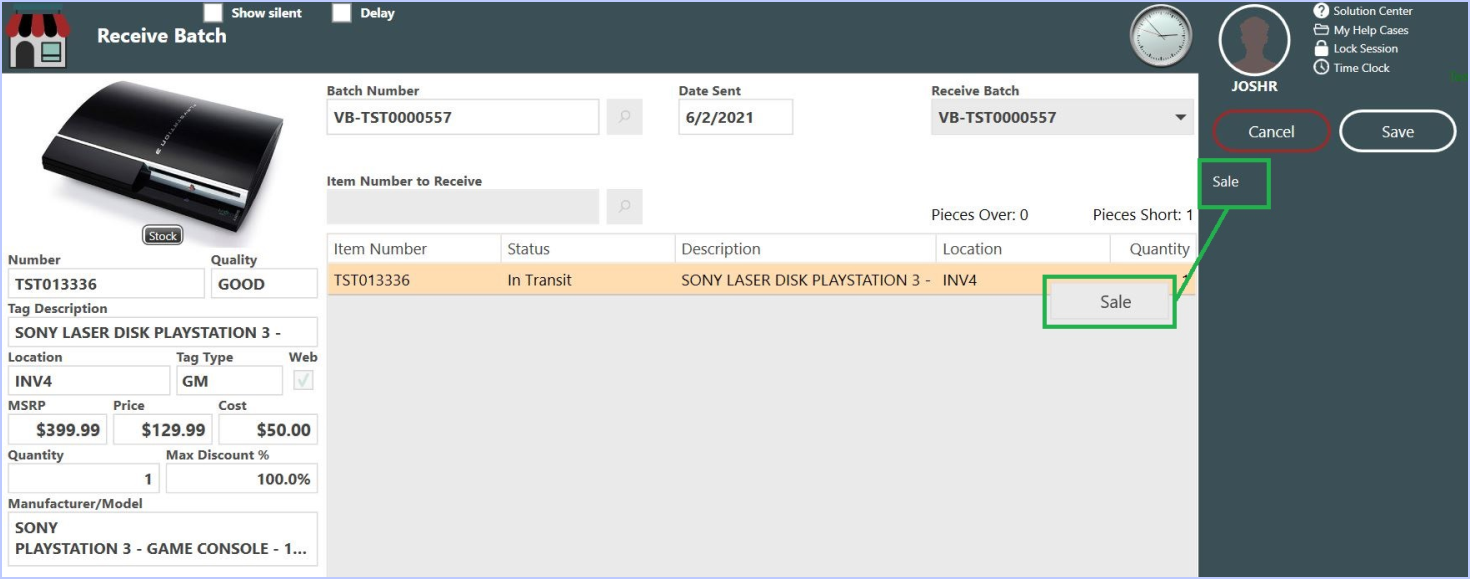
- Enter the sale price of the item in the Price field, then select Ok and Save

- A transaction will be opened to complete the sale to the vendor. If necessary, edit the Shipping Price associated with the sale, which is automatically added to the transaction.
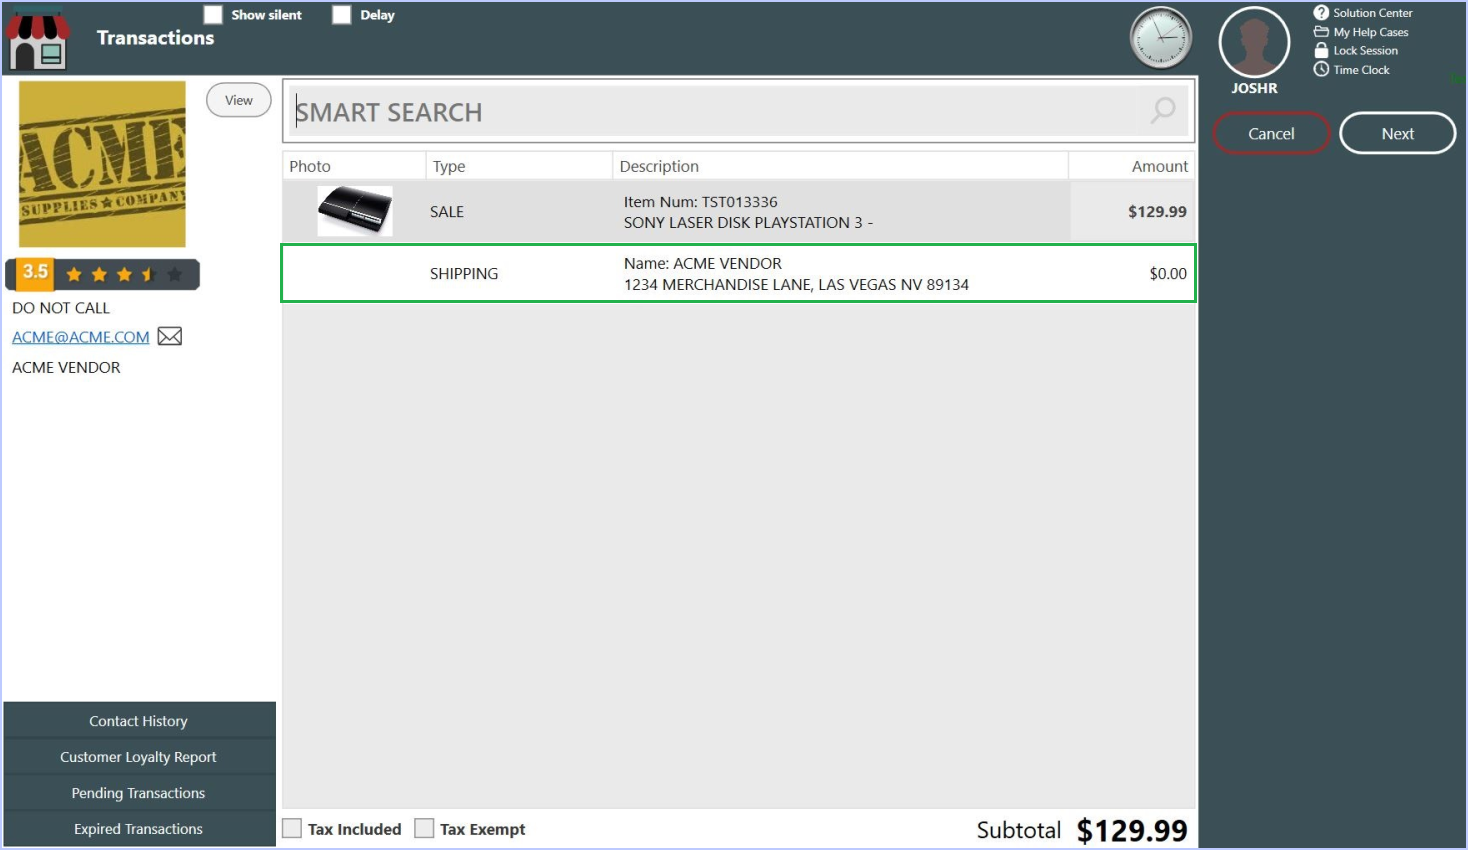
- Sales tax may apply. Process the transaction like any other sale (omni-channel, commission associates, etc.).
- You can return items from the vendor before finalizing the sale, or save the sale and return later to receive or sell additional items.
- The batch stays open until all items are sold or returned.
- To return items, scan or enter the item number in the Item Number to Receive field, then select Receive Back in the Choose Action dialog.
- Returned inventory must be relocated. Firearms will create a new line in the ATF A&D book with the Acquisition Date matching the return date.
- For items sent for repair, you may need to add the repair cost in the Additional Cost field of the Choose Action dialog.
- If the Edit Cost security option is enabled on your profile, the Cost is displayed for reference to the Original Item Cost.

- Once you click Ok, the Additional Cost will be added to the original Cost, and this sum will appear in the left panel of the Receive Inventory screen when the item is selected.
- This sum will become the cost of the item when you click Save.
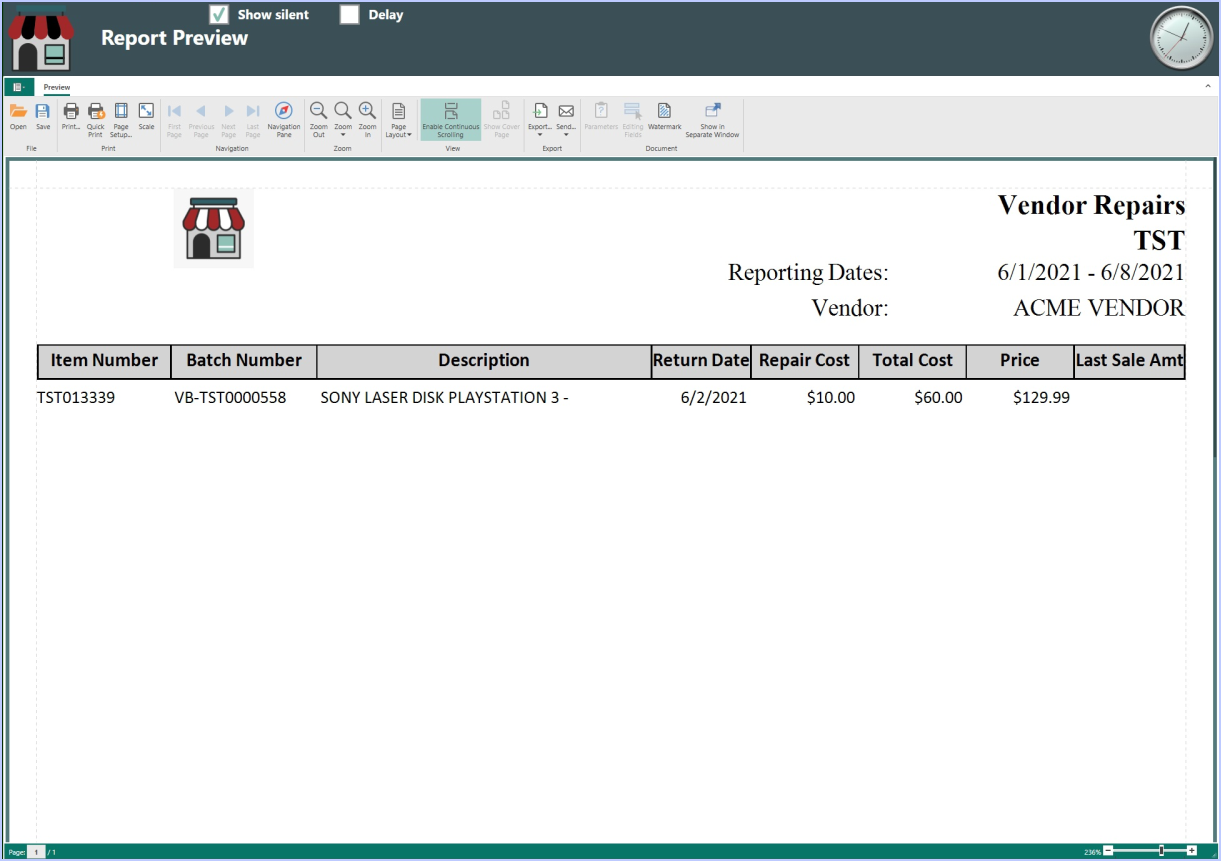
- Any items that received Additional Cost when received back from a vendor will be shown in the Vendor Repairs report, which can be found under Inventory Reports in Reports.
Sample Report