Bravo offers a Physical Inventory Application to help make your inventory audits smooth and easy. This article will go through the process of performing an inventory audit. Click on the links to navigate through the article. Links that open in a new window will be noted.
In this article you will learn:
In this section, you will learn how to start using the Bravo Physical Inventory App.
These are the terms that you may hear or see when working with the PI App:
- Adjust Snapshot - Adjust audit list to account for daily activity
- Audit - List of items to check for Inventory
- Duplicate - Item that was scanned more than one time
- Full Inventory Audit - Audit of full list of inventory items in store
- Full Loan Audit - Audit of full list of loans in store
- Items Remaining - Items not yet scanned
- Overage - Items scanned that were in excess of the original list
- Reconcile - Solving issues with audit
- Scanned Count - Total count of items scanned
- Session - Inventory audit
- Shortage - Item not found while scanning
- Snapshot - List of items that fit audit criteria
- Unknown - Item that was entered without a known Bravo number when scanning
Downloading and Installing the Bravo PI App
Download the Physical Inventory Application here .
If you download the PI app to a computer that is already running Bravo, you will not need to provide a license. The app will obtain the user licensing information from Bravo directly.
If you choose to download the app to a workstation that has not previously run Bravo, you will need to enter a license key. This can be any license key in your store. If you use a license key set up for global access, you will be able to take the computer with the PI app to every store that is accessible from that license.
If you need a copy of a license key, please contact Bravo Support. (888-407-6287, option 3)
Once you have the app, your first step will be to start a new audit in Bravo before you can access the PI App.
Open Bravo and from the Dashboard, select the drop down on the side of the Inventory and choose Physical Inventory Audit

Alternatively, you can click the Inventory button on the Dashboard

From the Inventory Screen, select Physical Inventory Audit:

You should now be on the Physical Inventory Screen with any currently active audits:

Click Add New Session to start a new audit.

This will open the Add New Session dialog box

If you have previously entered an audit, you will have the option to copy from an existing audit session. Otherwise, select "Create New" and then click "Ok"

The first thing you need to do is name your report.
Next, you are going to need to select some search criteria. Creating an Audit session is just like creating an Ad Hoc report.
You will need to add criteria for Bravo to search on and narrow the parameters of your audit.
Status is the first criteria and it is a must have for the audit. Select the status that you want to search on. (for example, Status = Inventory will allow you to search all items in an inventory Status. Status = Loan will pull in all items with active loan status.)
Next select a new criteria from the drop down menu. Each search criteria that you add will narrow the scope of your audit. If you are wanting to audit a particular category of inventory, select "Category" as the criteria. If you are wanting to audit a particular location in your store, select location. If you want to audit all of the watches in case 2, select both category and location.
If you need to change the operator (the = sign for example), simply click on it to change the search criteria. Depending on the criteria you are viewing, you can change equals into a range, to be greater than or less than, or to include or exclude certain categories.
The button labeled "Random Count" will allow you to audit a random selection from your audit list. When Clicking this button you will be given a box where you can enter the number of items that you want to randomly check.
**IMPORTANT** There are two full audit options for you: "Full Inventory" and "Full Loan Base". These are provided as a convenience for you. Before you decide to select these, however, you want to make sure that you account for the size of your inventory, the manpower available, and any time constraints. Full Inventory and Full Loan Base Audits can take a very long time to complete, and unless they are adjusted every day for daily activity, they can be difficult to reconcile without issues. Therefore, Bravo recommends that you attempt to break down your inventory audit into smaller, more manageable pieces.
Once you have all of your criteria in place, click "Next".

This will be a full list of everything that will be contained in your audit. This is your chance to verify that these are the items that you want to check. If you are missing some, or if the list is too long, you can click "Back" to go back to the Inventory Criteria and change or tweak the session. Once you have the list that you want, click "Print List" to print out the audit list.
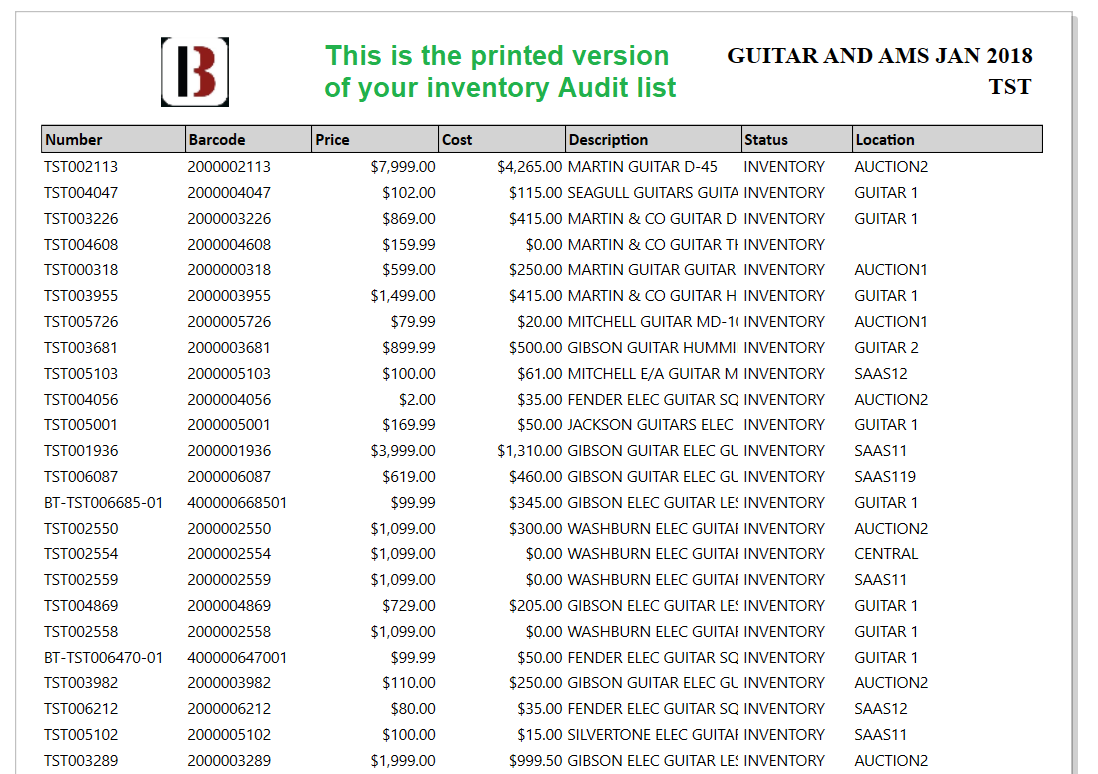
You now have a list of items that you can take with you as you scan.
Once the audit is created, the items that are on the list will never change. This means that any new items that would fit the criteria of the audit will not be added. And any items edited to NOT include one or more of the criteria of the audit will still remain on the audit.
Once you have set up your audit session, you are ready to perform the audit. This section will help you learn how do deal with issues that come up as you begin scanning into the app.
Bravo recommends that you install the app on a wireless portable device capable or running Windows. This is so that you can move freely around the store. (This would need to be a tablet or larger - Windows based phones will not work). It is also recommended that you have use of a bar-code reader to make entry easier. However, neither of these things are necessary to perform a successful audit.
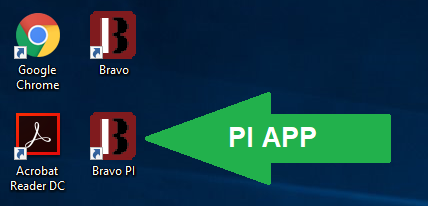
Open the PI App.
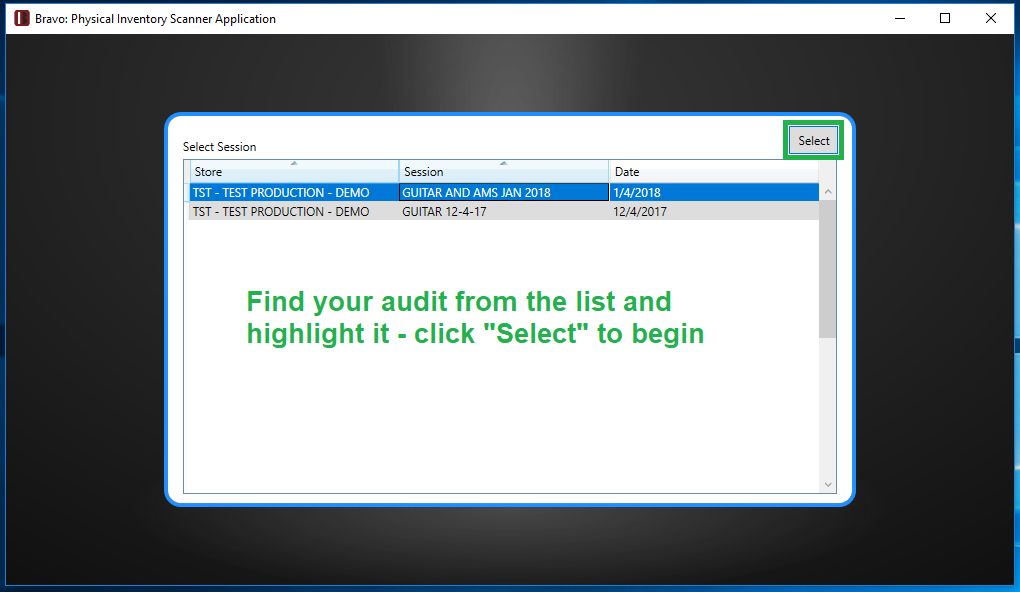
Before you have signed in, you will see a list of all of your audit sessions. Highlight your audit and click "Select". (If this is your first audit, you will only see one on the list.)
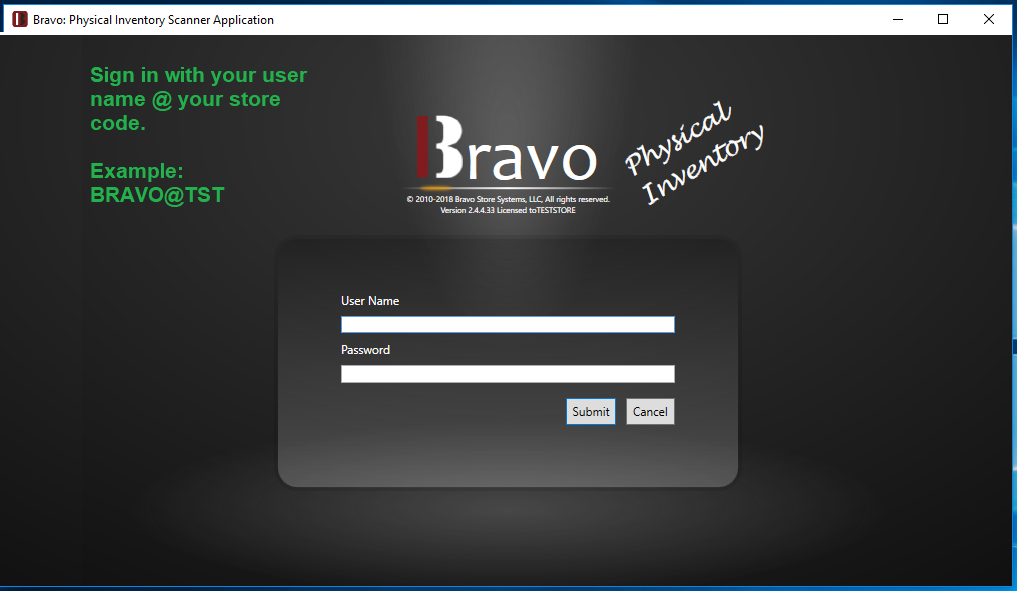
To sign in, use your Bravo User Name, the @ symbol and your store 3 digit code. For Example, User ID BRAVO and Store Code TST will enter "BRAVO@TST" as their User Name in the app. Enter your Password.
Begin scanning your items. (If you do not have a barcode scanner, you can enter the inventory number in the field manually.)
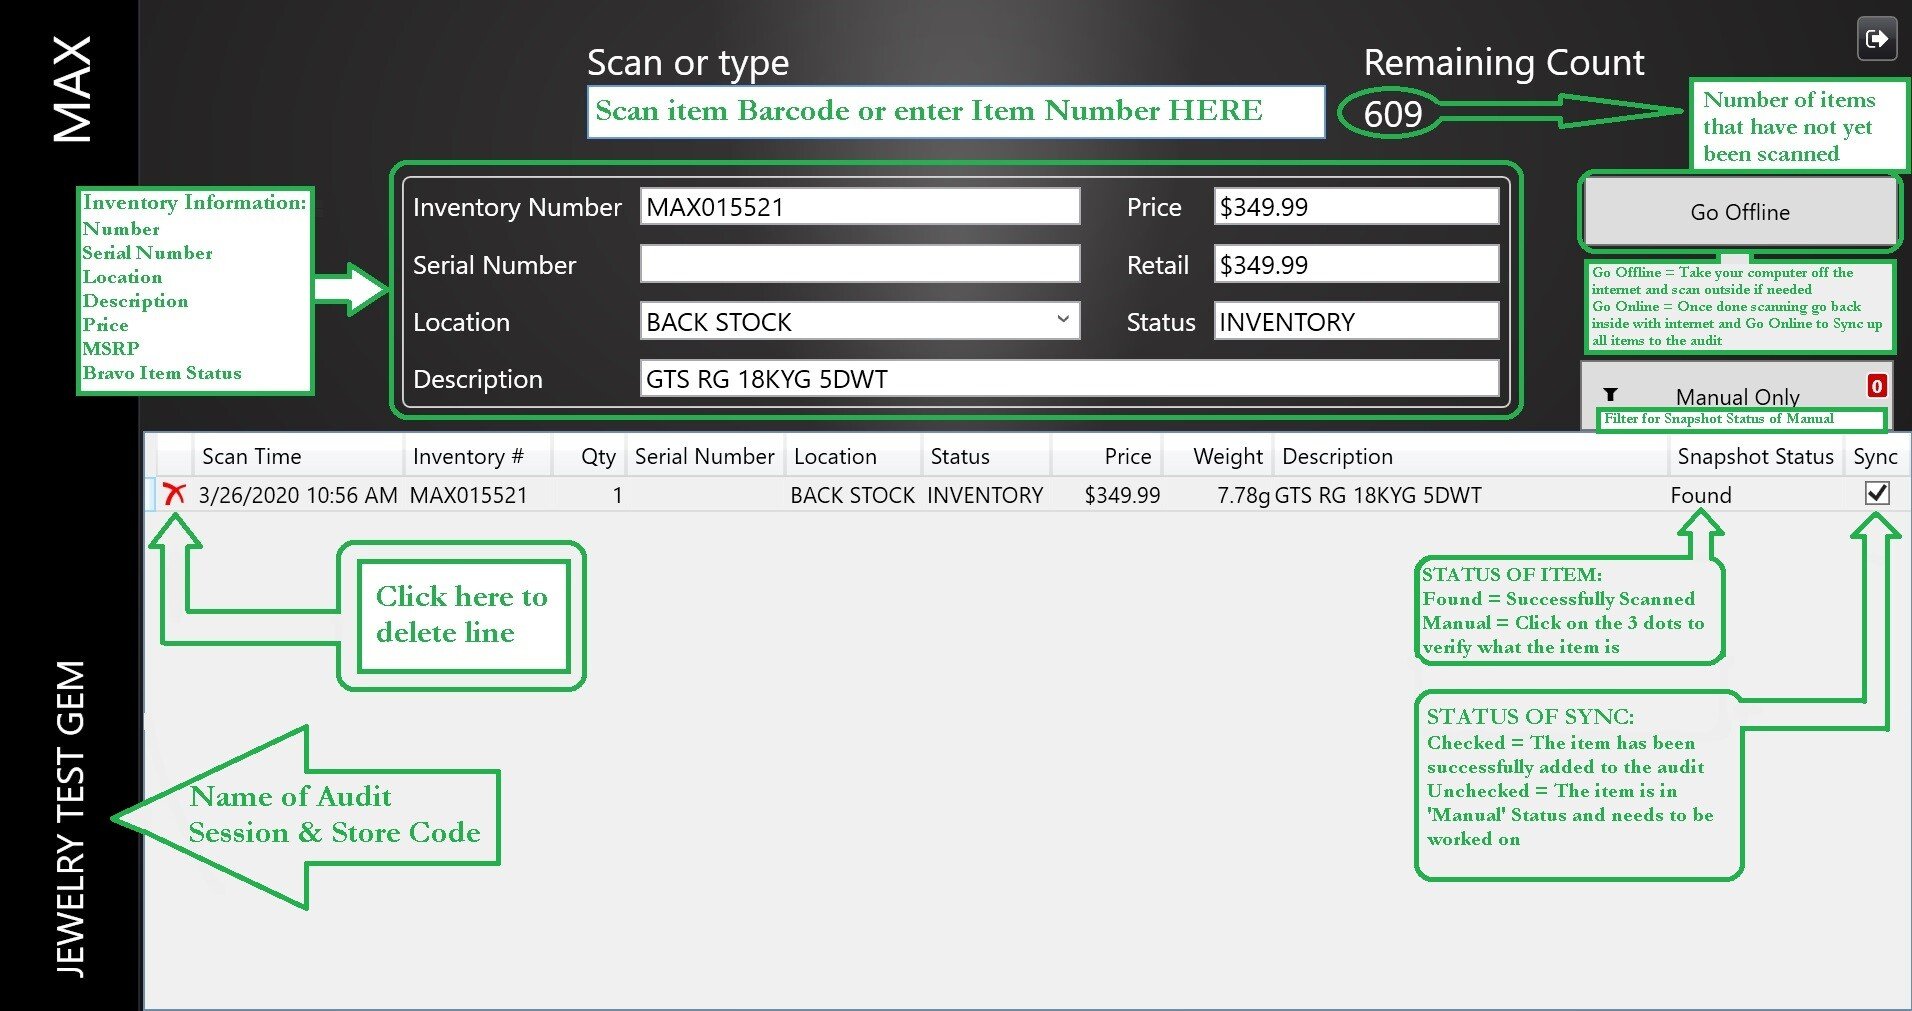
At the top of the window is an entry field. This is where you will either scan or enter your item numbers as they are found. As you enter each one, you will see the inventory information populate in the fields beneath. To the right of the entry box, you will see "Remaining Count". This is the number of items that you have left in your audit.
As each item is entered, it will populate a list in the grey field at the bottom of the app. To the left is a red x to delete line items if necessary. You will also see the status to the right. Items will be entered as either "Found" or "Duplicate".
Along side of the window you can see which audit you are conducting.
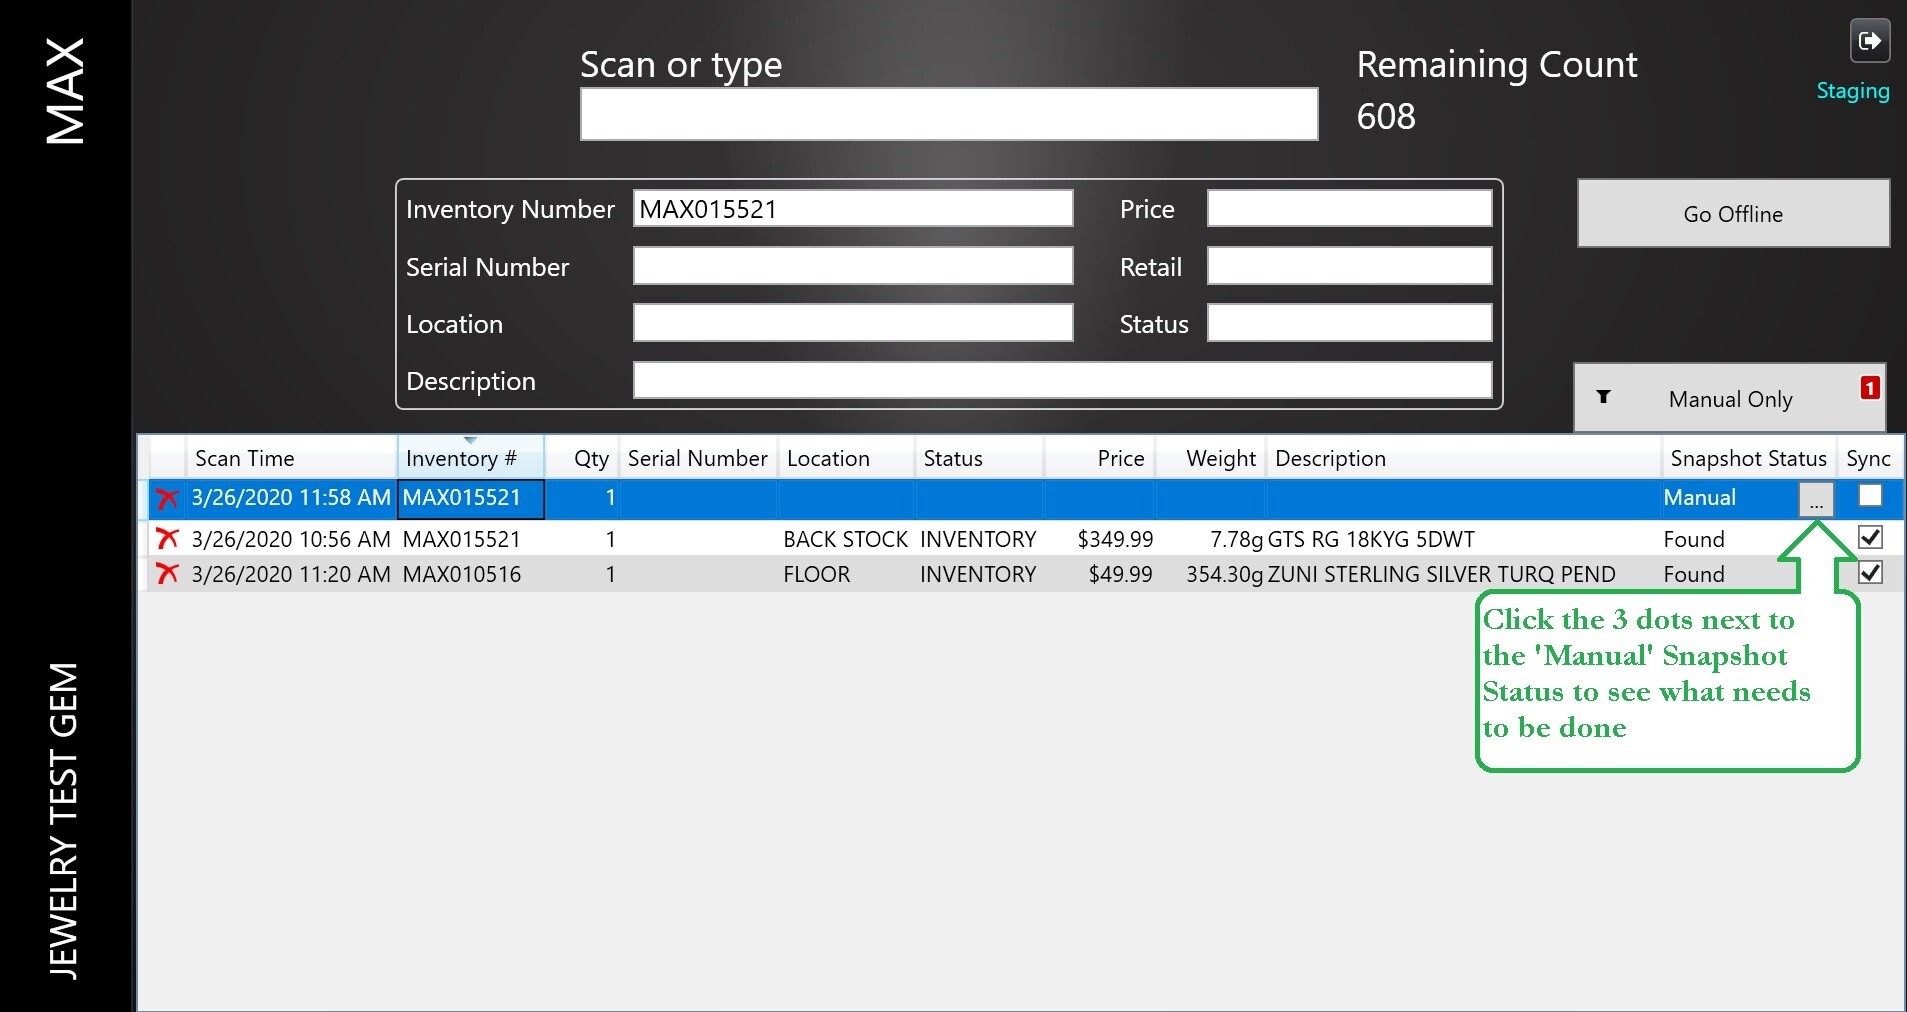
First, you will see that the item has a "Manual" snapshot status. Click on the 3 dots to bring up the warning.
The warning states "This item was already scanned before"
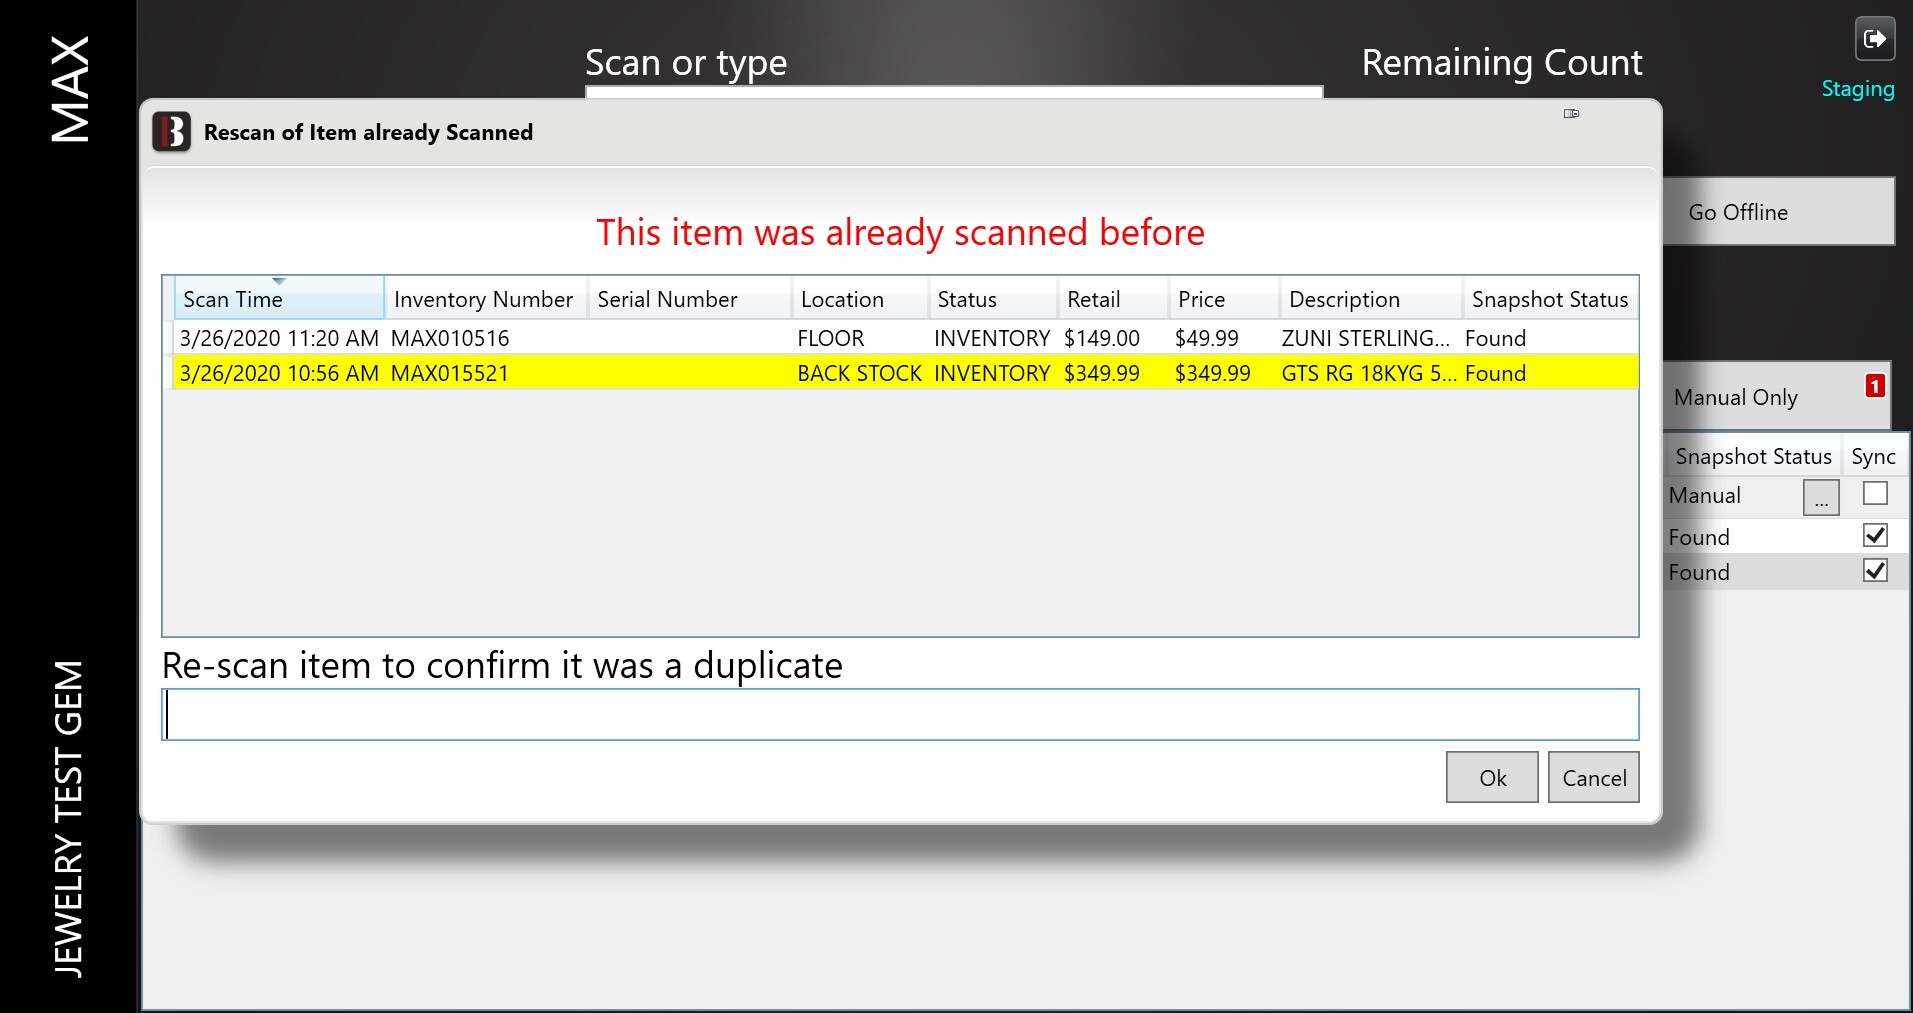
You will then see the list of items, with the duplicate item highlighted. At the bottom of this list is a box that says "Re-Scan item to confirm if it was a duplicate.
ONLY SCAN IF YOU TRULY HAVE TWO OF THE SAME ITEM.
If you inadvertently scanned the same item twice, you will want to click "CANCEL" to get out of this box.
If you do not have two items with the same tag number, do not scan again.
If you accidentally do scan again, you will see the duplicate on the item list:
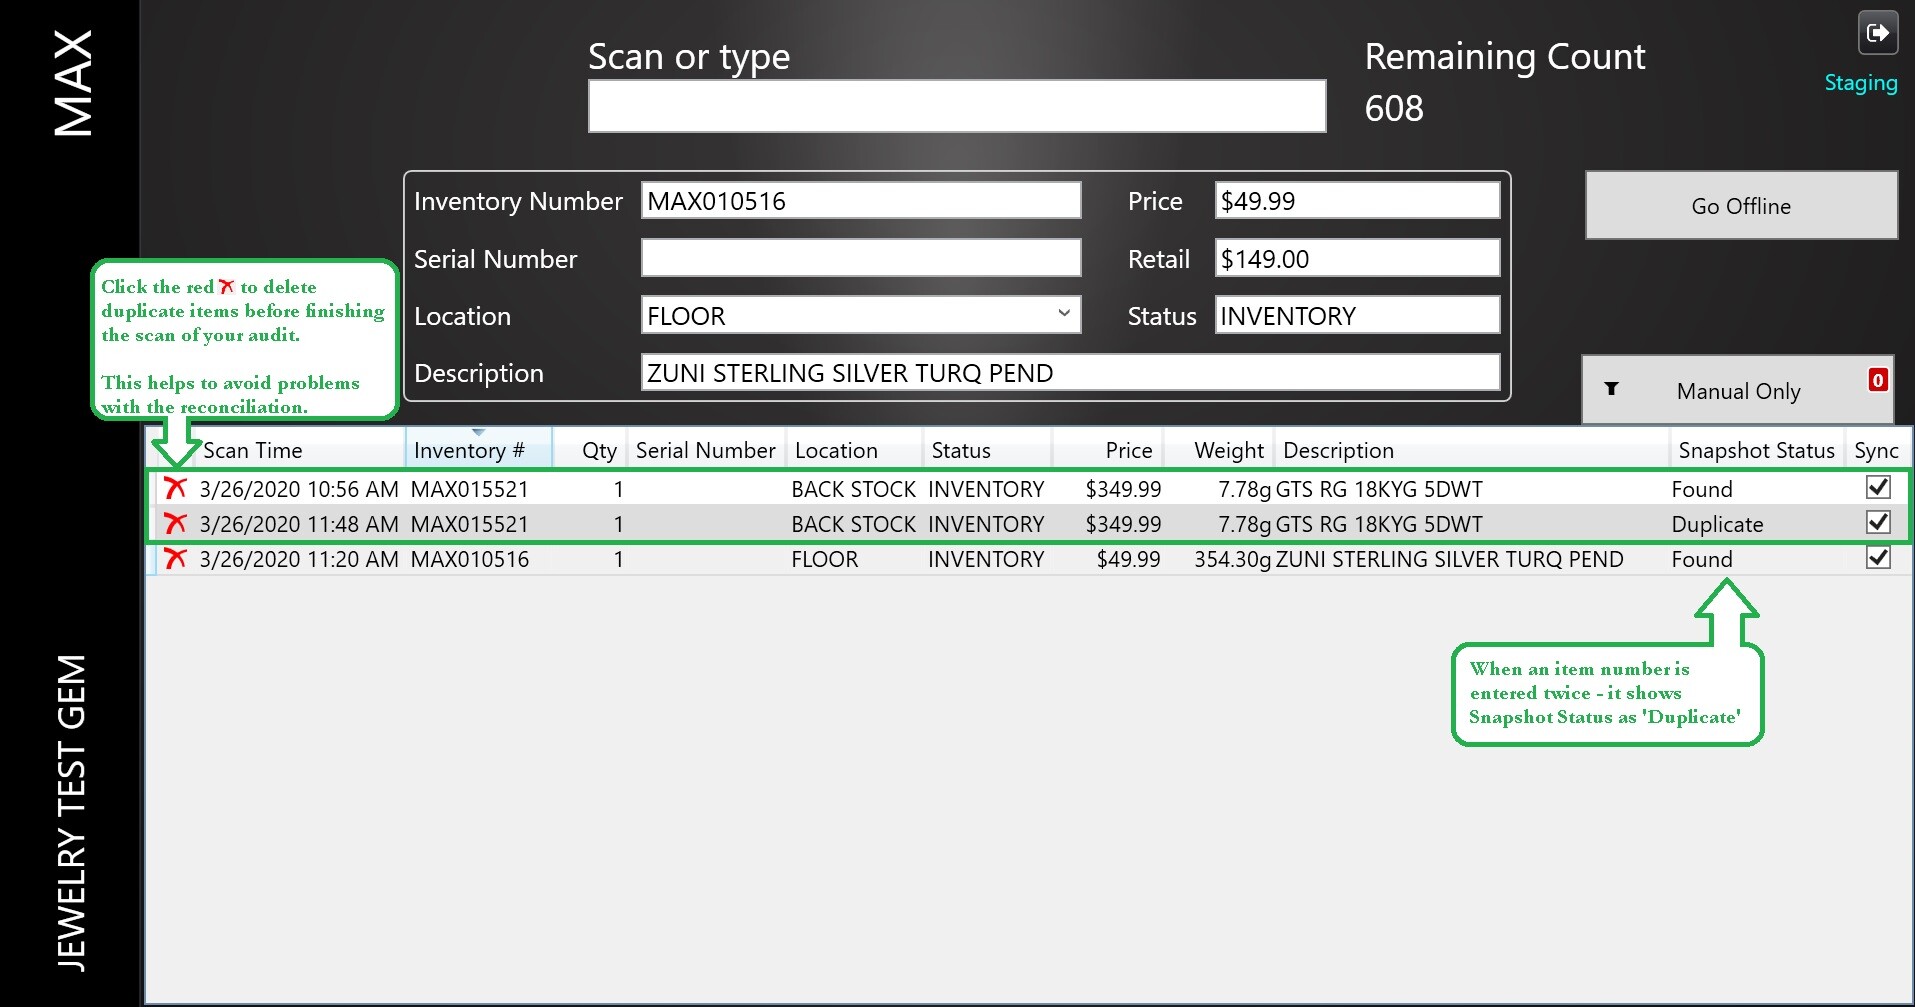
When you see a duplicate that you did not mean to enter (accidentally scanning the same item twice for example), you can still delete it if you click the red X to the left of the line number. If you do have two items with the same ticket, you can leave the duplicate for later reconciliation.
If you enter an item that is part of your inventory, but not part of the audit, you are going to see that the item is highlighted in red on the Audit:
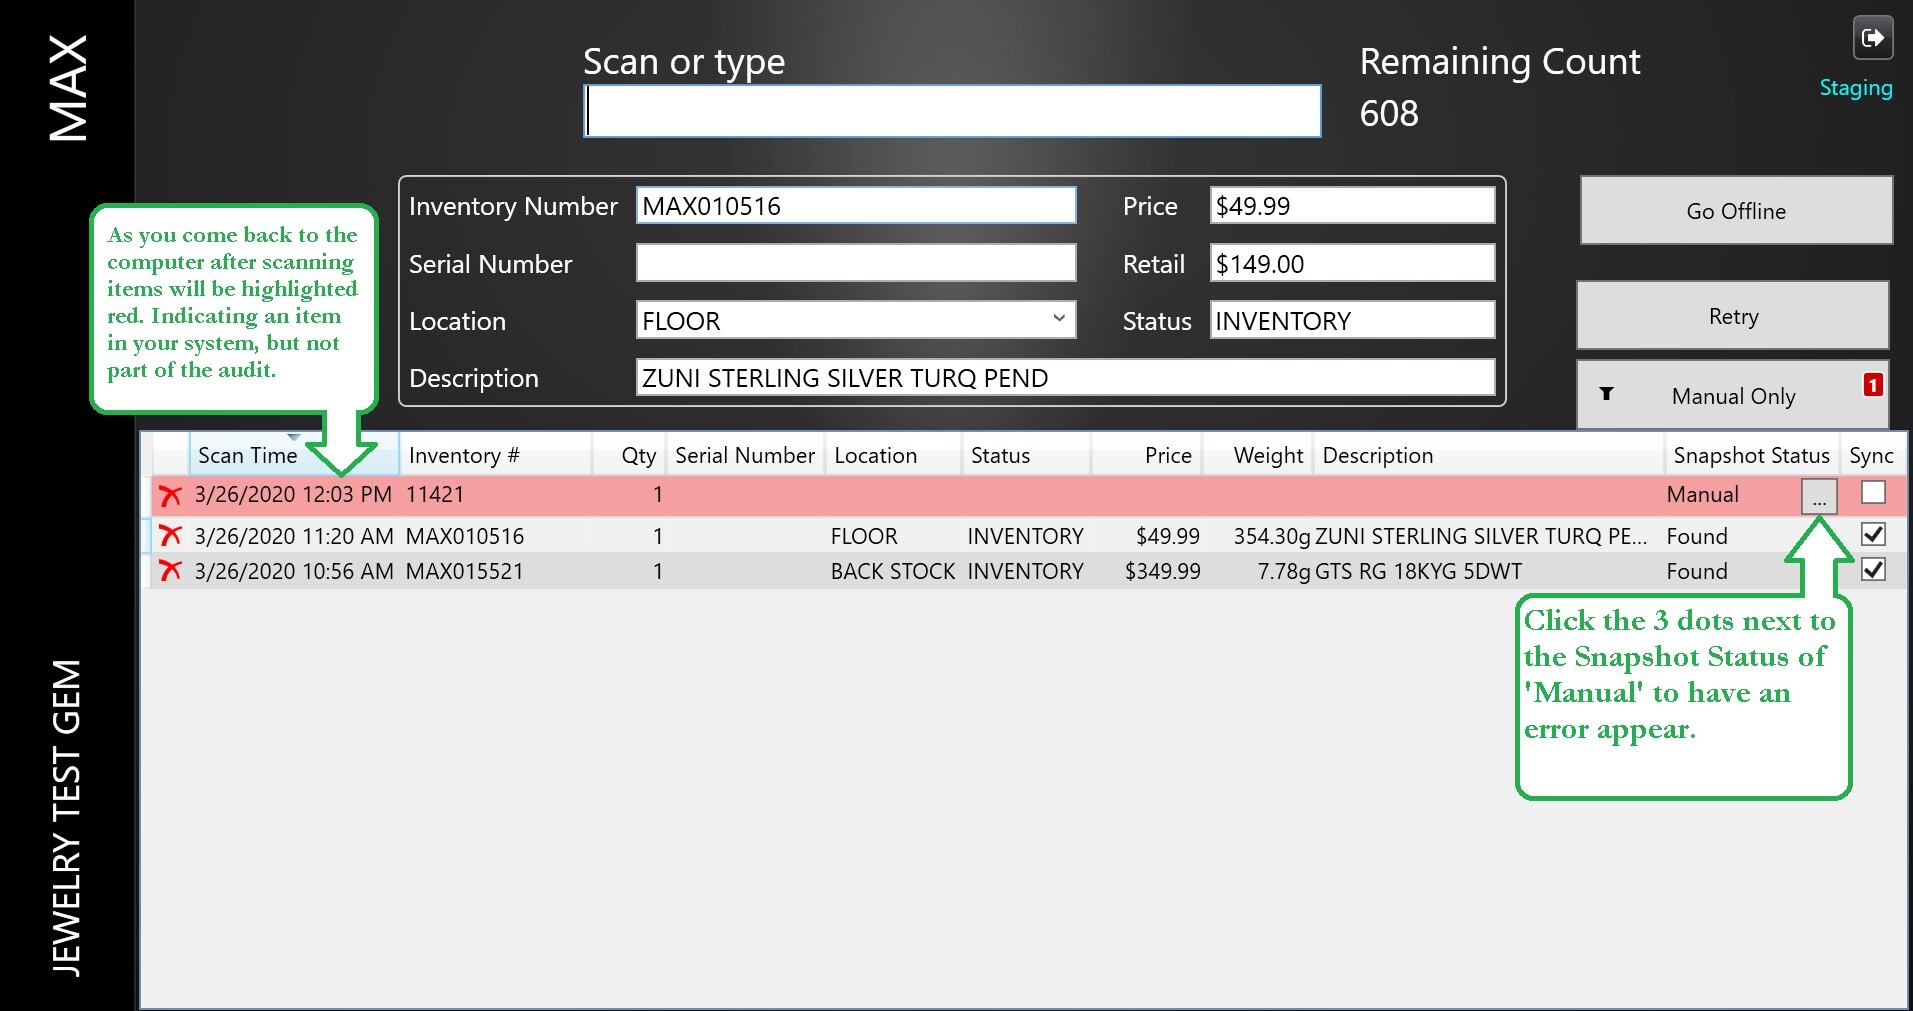
What you will do is click on the 3 dots next to "Manual" and Bravo will let you know that "Item is not something you are looking for" and remove it from the audit.
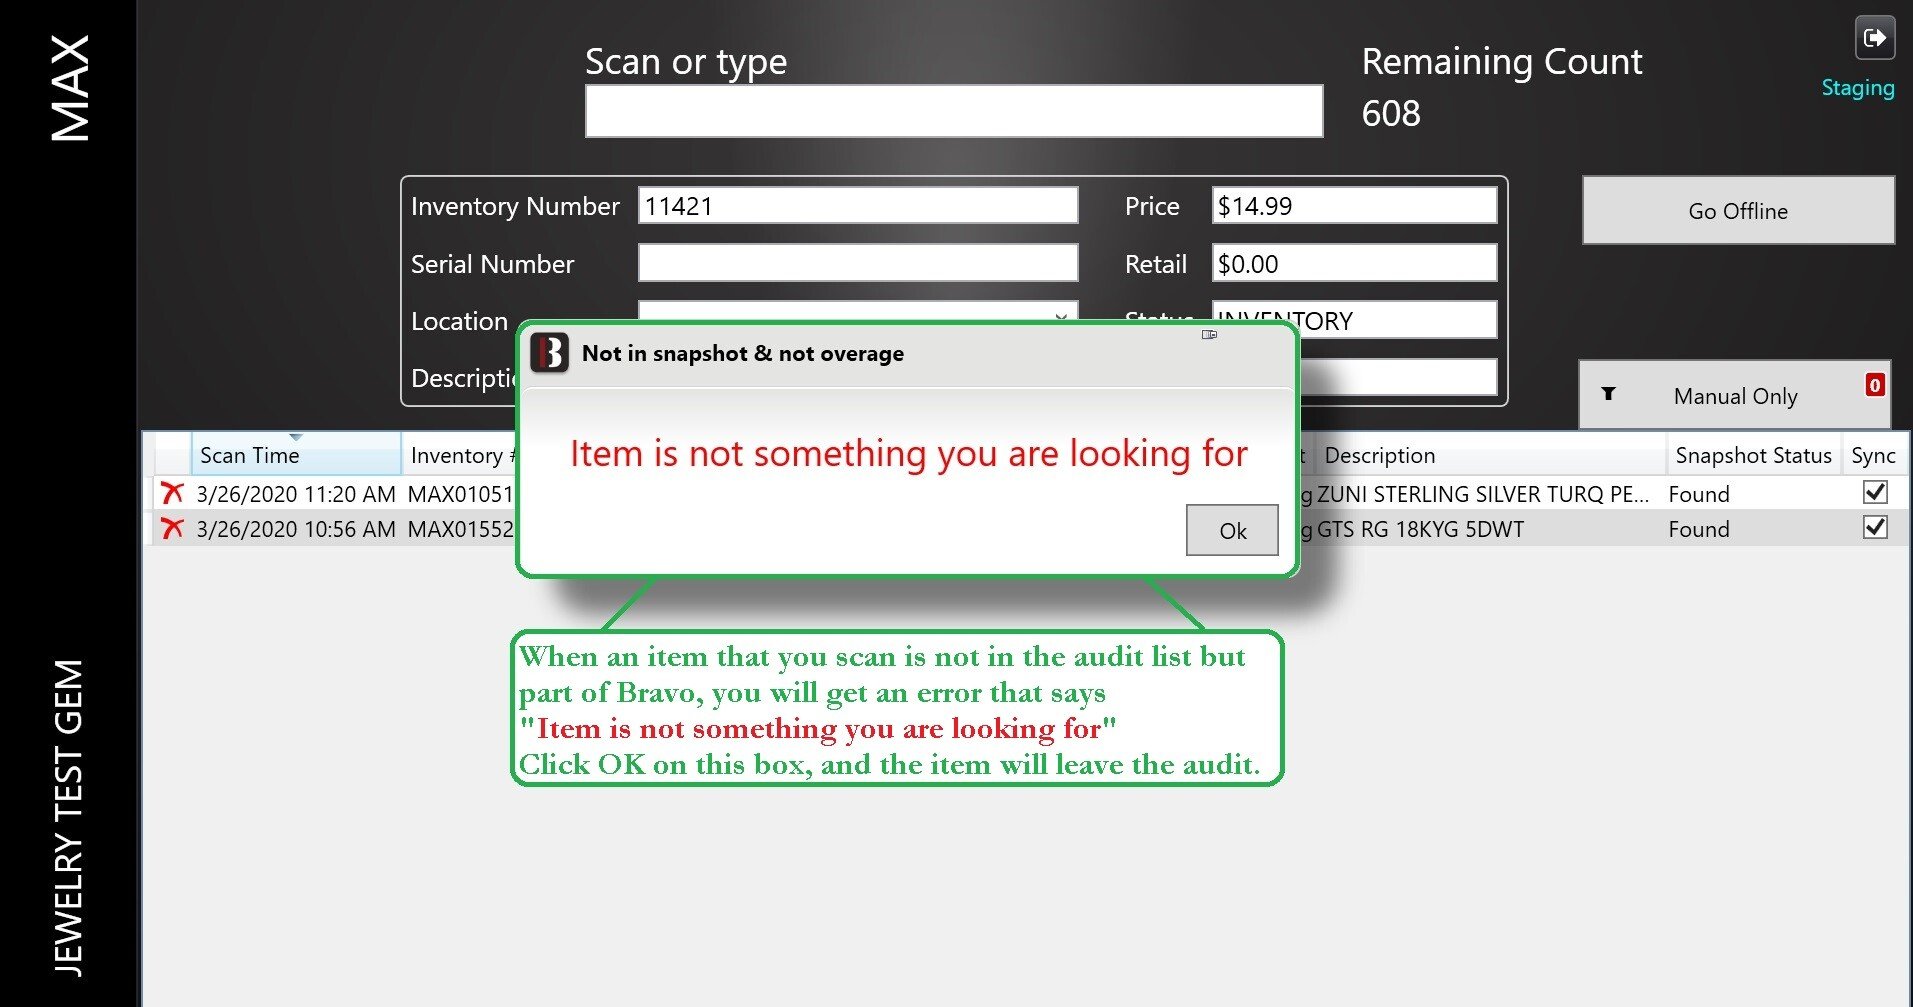
Clicking "OK" on this box will bring you back to the scan page. You will not be able to enter an item from your inventory that is not a part of the audit.
If you enter an item number that is not recognized by Bravo, you will see a different error:
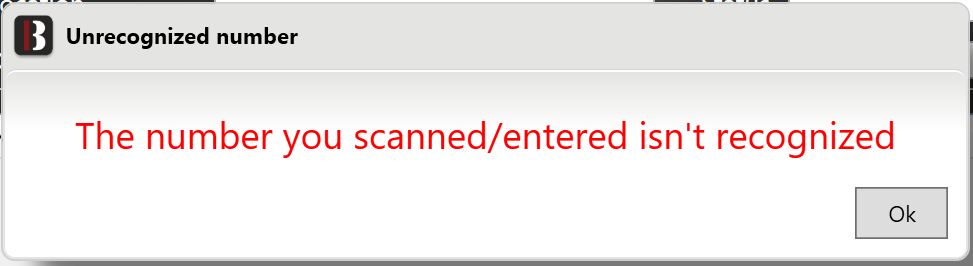
This error states that the number that you entered isn't recognized. In other words, this is not a Bravo number at all. Clicking "OK" on this window will generate a new box:
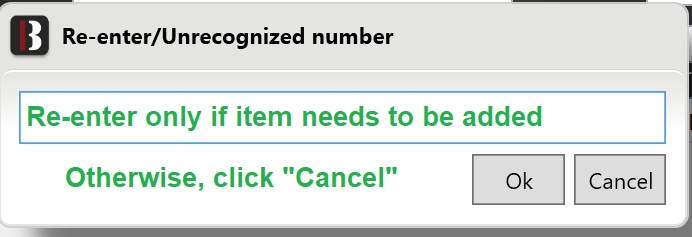
**IMPORTANT** Only re-enter the item number if the item in question needs to be added to the audit. Otherwise, click "CANCEL" to exit the window. If you enter the item number, you will generate a new line item with the status of "Unknown". You will need to reconcile this unknown item.
As soon as you have completed scanning or entering the items from your list that can be found, you need to close the PI App. You can click the button at the top to log out, or you can click the red X to close the window.
Once you have finished your scan and exited the PI App, you are ready to begin reconciling your audit.
Go to Inventory, and then select "Physical Inventory Audit" to get to the list of audits. Highlight on the audit that you just performed and click "Reconcile"
The very first thing you will see is a box asking if you are done with your scan:
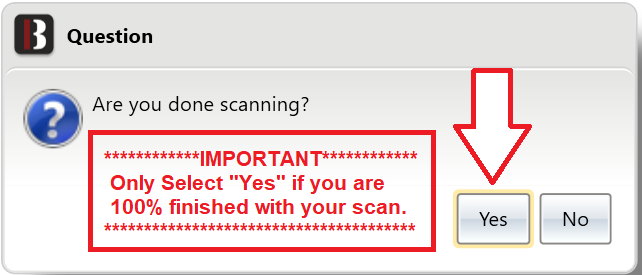
It is important to remember that you should only click "Yes" if you are 100% done with your scan. You do not want to start reconciling until you are done scanning.
You will now see a list of all of the items from your audit. The first column on the left is "Result" here you will see the status:
- Found - Item was scanned successfully with no problem
- Overage - The item was a duplicate scan, or an unrecognized item
- Shortage - Item was not found/scanned before audit was finished
To the right you will see a list of buttons. Overages, Shortages and Unreconciled will all show numbers on them, indicating the number of items that you need to review under each.
Click on "Overages" to get a list of these items.
Here you will see any duplicate items or items with unrecognized numbers.

Items that are in the list as a result of being scanned more than once are checked as duplicates. Items that are in the list as a result of the number being unrecognized are checked as unknown.
Verify once again that these are indeed duplicate items, or additional items that need to be added into Bravo. In order to add the item and clear the overage, you will need to purchase these items into your inventory by clicking on "Purchase General Merchandise" or "Purchase Jewelry". This is the same function as you would normally perform when purchasing from a vendor. In this case, you will want to enter your own store as the vendor.
For information on how to purchase items into Bravo, see "Purchase Items into Bravo" located here . (Link will open in a new window)
If items are purchased into Bravo and later discovered to not be true overages, they will need to be written off.
For items that were not found during the audit scan, you will click on "Shortages"

There are three options for reconciling shortages:
- Explain with Note
- Write off Item
- Confiscate Item
If an item was not scanned because it was out for repair, for example, you can enter a note showing that it was out for repair. If an item was missing a tag and therefore missed the scan, you can put that in the note as well. The note field is on the left side of the screen. Highlight each item to read and/or enter any notes for that item. Click "Accept" to save the note. Click "Explain with Note" on the right to clear the item from the shortage list.
If an item is truly missing, and there is no reason for it, you will need to write it off. Click on Write off item:

Once you click ok on this box, you cannot undo this action. If the item is later found, you would need to purchase it back into your inventory.
If you are going through your audit and you find an item that was confiscated, but never noted in the system, you can mark it as confiscated here.

You will need to fill out the box and click OK. This will write the item off as Police Confiscation. This cannot be undone.
Important Note: Sometimes sessions cannot be closed because SKU items have not been reconciled.
To reconcile SKU items, follow these steps:
- Go to Reconcile.
- Filter "All".
- Click on the filter button on the "Reconcile By" column and tick the checkbox for the blank value. This doesn't work for "Reconciliation Reason" so be sure to use "Reconcile By".
- For each item shown, reconcile it. For SKUs, click Reconciliation Information and see that the quantity matches and there's no error. Write a note to indicate that everything is okay. If you need to, you can adjust quantities/etc.
Once you are finished reconciling any overages and shortages, you are ready to close your audit. Click "Done" on the top right corner of the reconcile screen. This will take you back to the main audit page. Click "Close Session" once you are finished.

The status of the audit is now "Closed"

You are able to see the scanned count, the scanned cost, the shortage and overage count and cost.
If you need to view the audit item list, click "View Reconciliation" from the right.
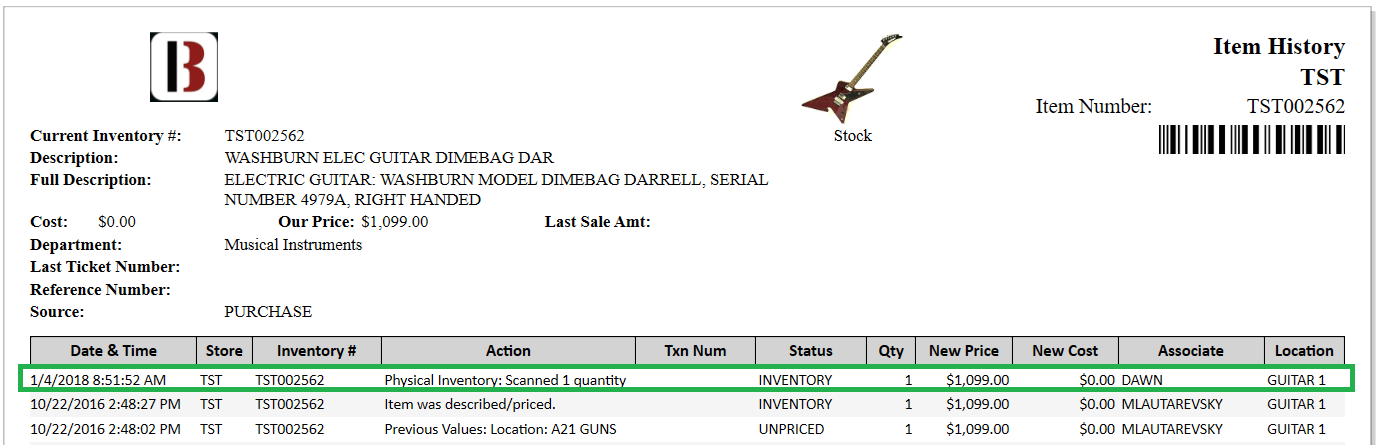
Bravo will show the PI audit scan in the item history.